Cloudflare Tunnel with FlyEnv
Cloudflare Tunnel is a Cloudflare service that connects a local service to a public hostname over an outbound-only tunnel from your machine — no router port forwarding or public IP required, which makes it handy for demos and remote access to a dev environment. FlyEnv's Cloudflare Tunnel module exposes local services on public hostnames without touching your router or firewall. You connect your Cloudflare account once, add DNS rules that map subdomains to local host:port targets, and FlyEnv drives the whole setup through the Cloudflare API — creating the tunnel, writing CNAME records and pushing ingress rules for you. Each tunnel runs as a managed process with its own logs.
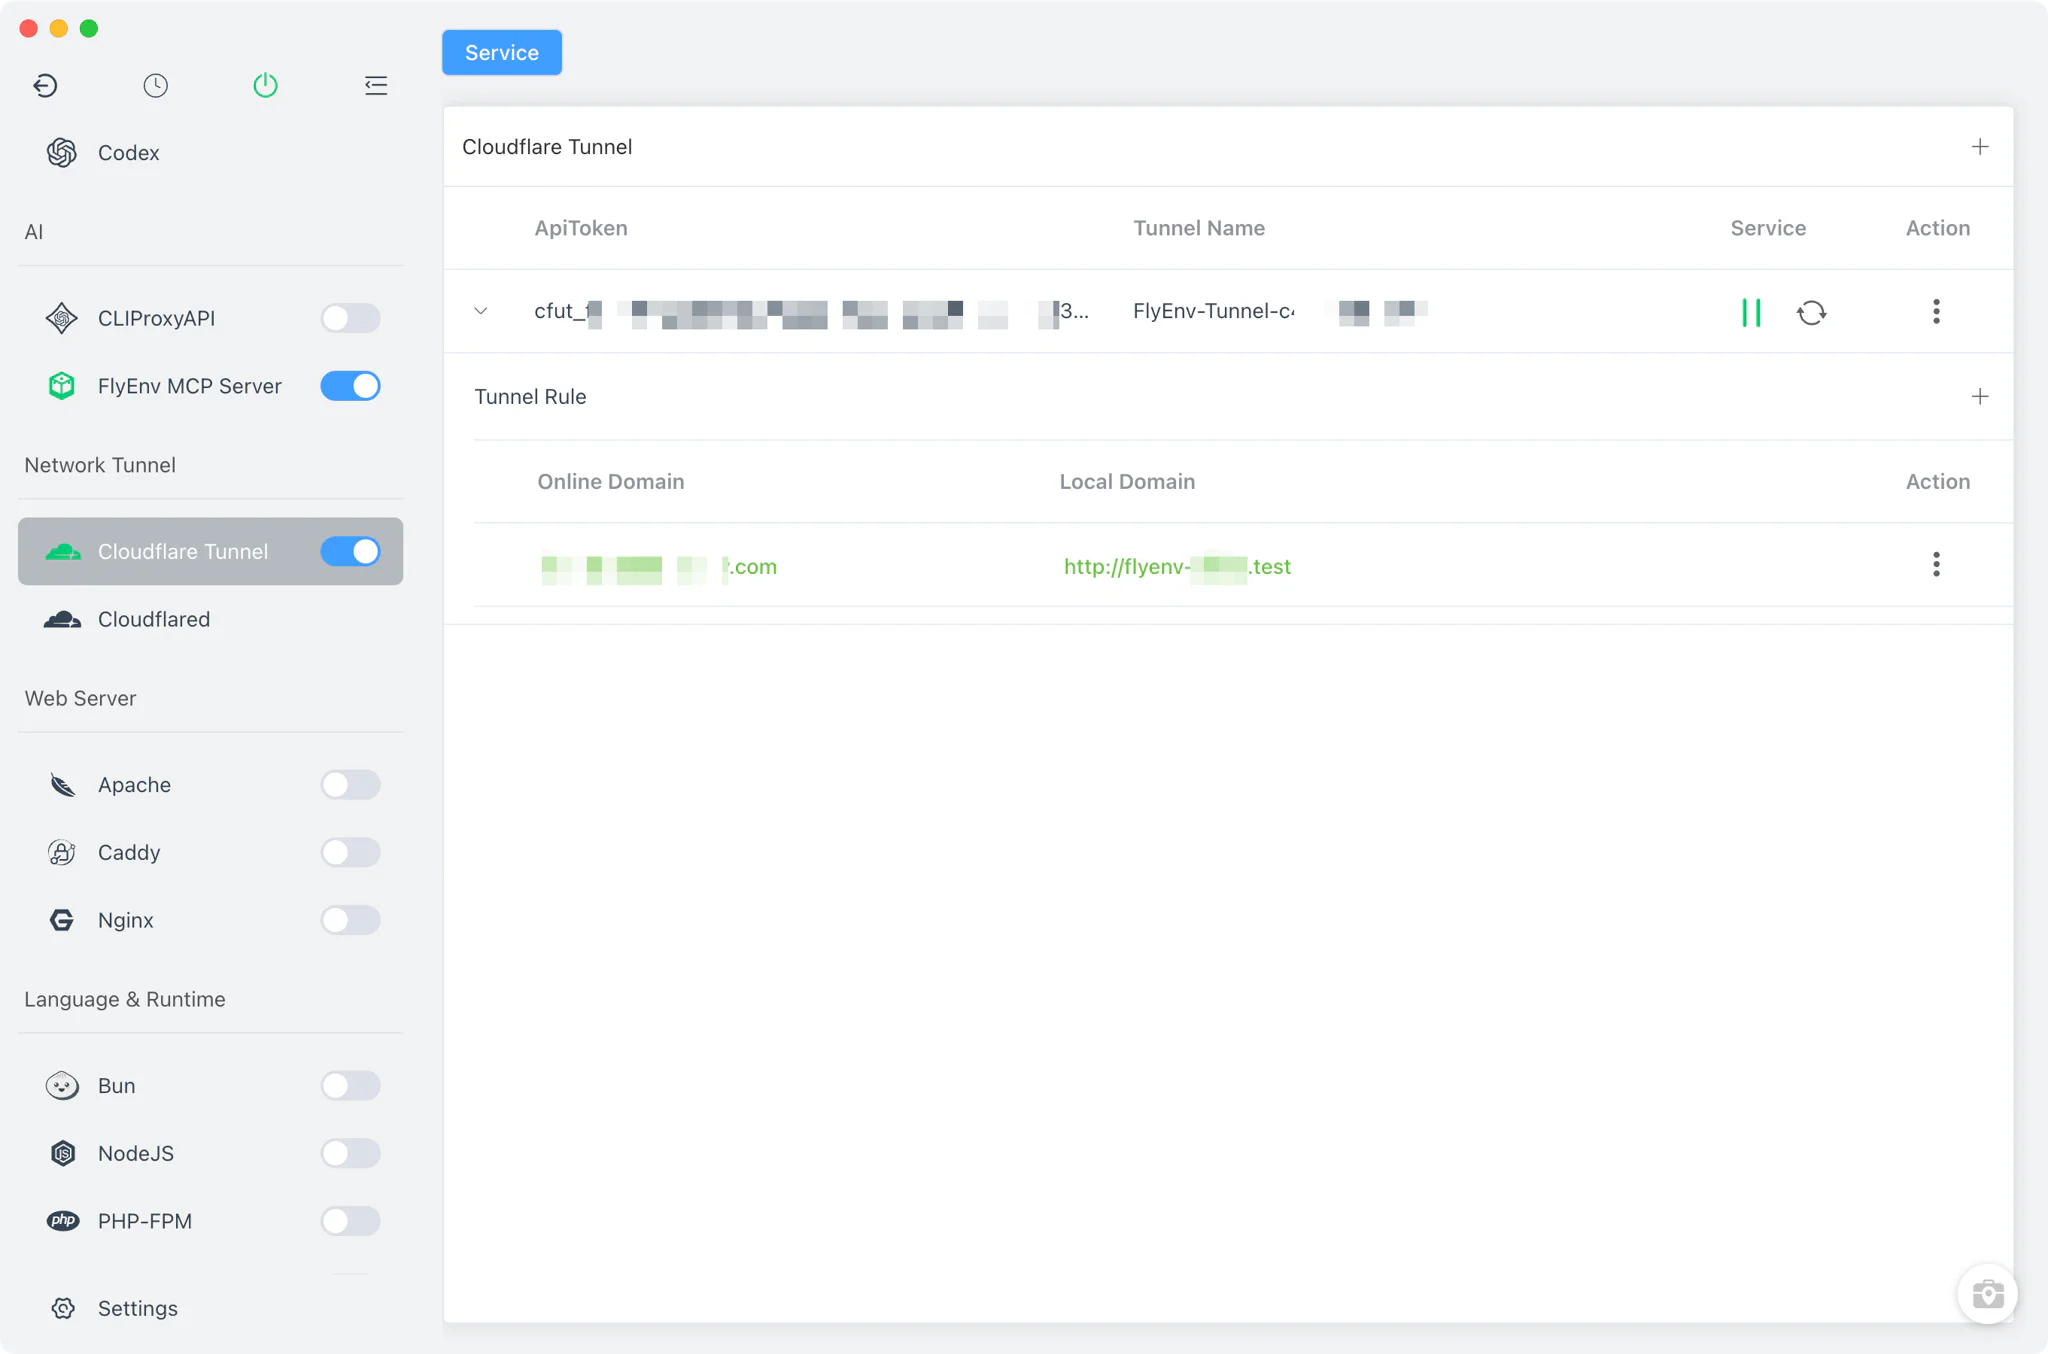
Tunnel setup
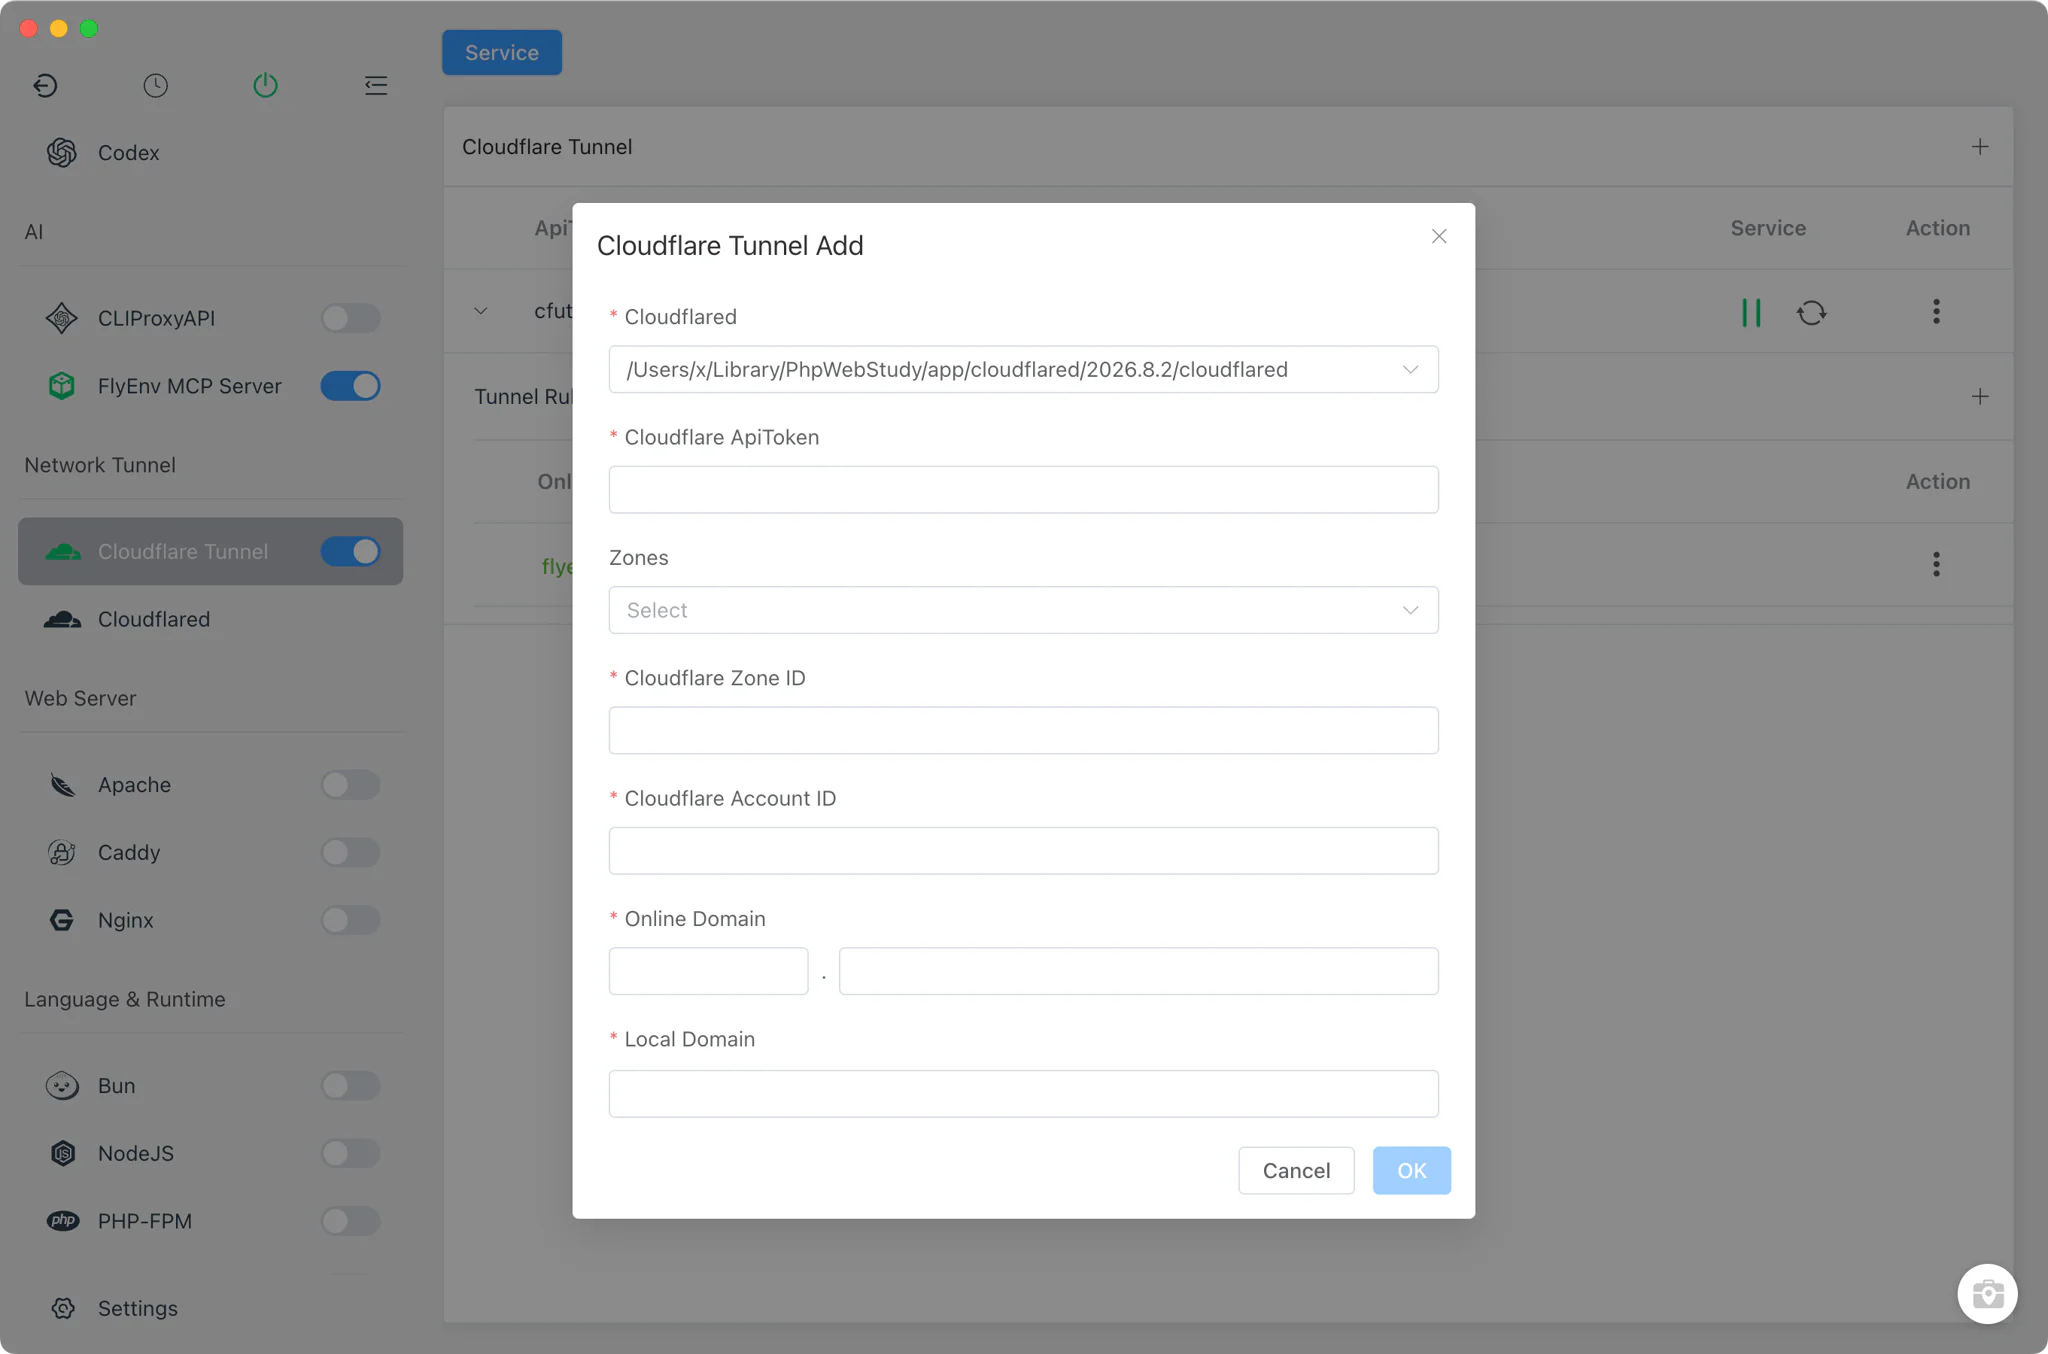
Open Cloudflare Tunnel from the sidebar and add a tunnel. The setup dialog asks for four things:
- cloudflared binary: the tunnel process is the
cloudflaredexecutable, so at least one version of the Cloudflared module must be installed first. Pick the version from the dropdown; if none is installed, FlyEnv tells you to install one before continuing. - API Token: a Cloudflare API Token with permission to manage tunnels and DNS on your account. FlyEnv uses it to talk to the Cloudflare API v4.
- Account ID: the Cloudflare account that owns the zone.
- Zone / Zone ID: the domain whose DNS records and subdomains the tunnel will use.
On start, FlyEnv finds — or creates if it does not exist yet — a remotely-configured tunnel on your account named FlyEnv-Tunnel-<token hash>, then launches cloudflared tunnel run --token <token> as a detached background process. There are no local tunnel config files to maintain: the configuration lives on Cloudflare and is managed entirely through the API.
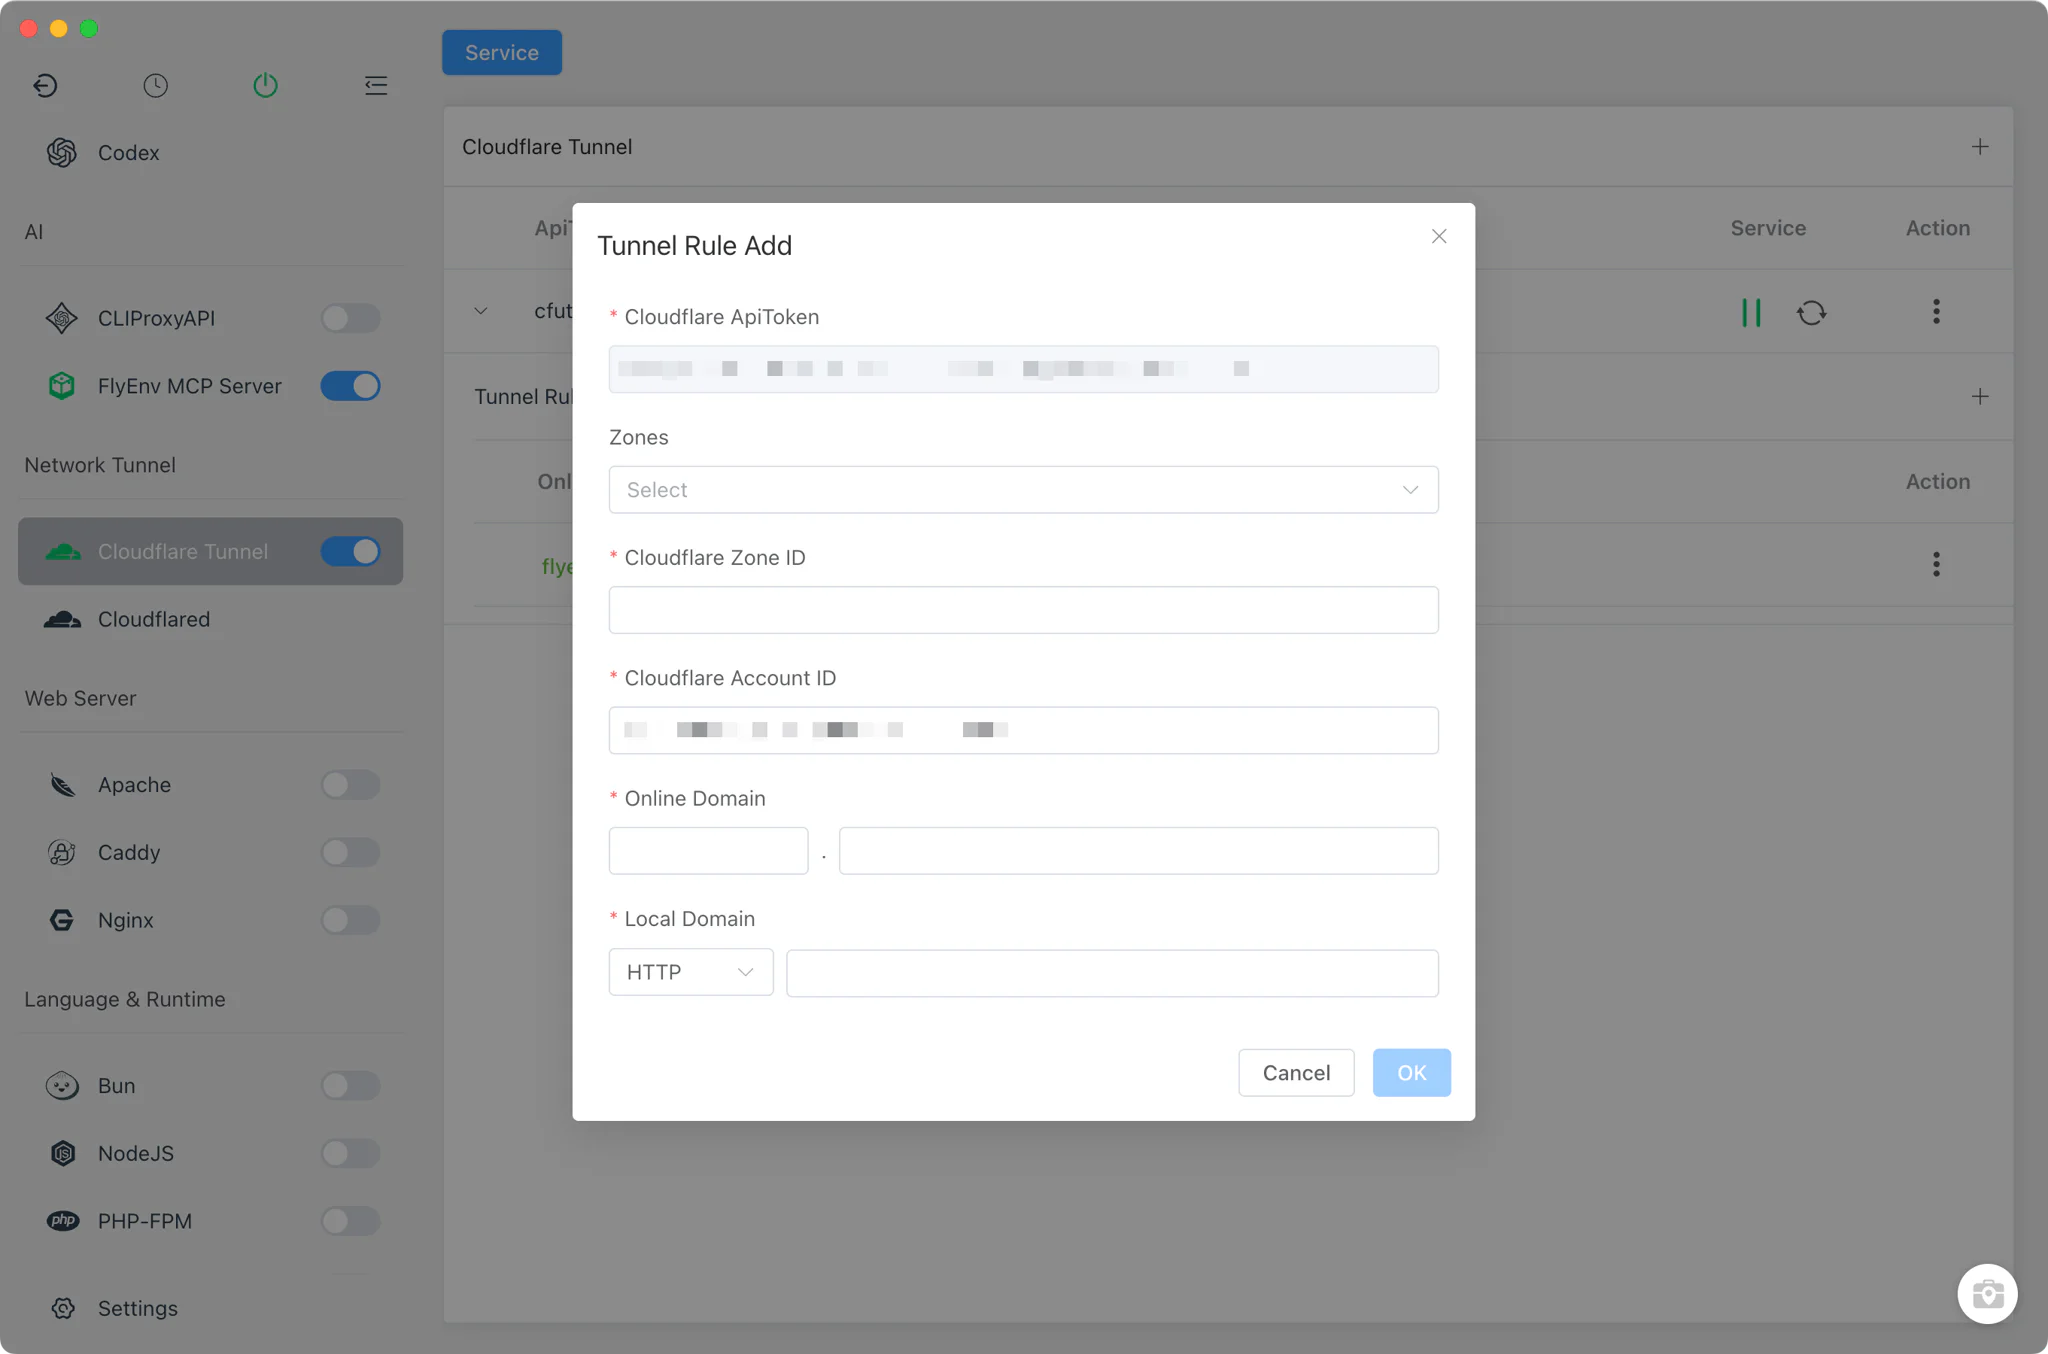
DNS rules to local services
Each tunnel row expands into a table of DNS rules. A rule maps a public hostname to a local service:
- Subdomain and zone: the public hostname, e.g.
demo.example.com. - Protocol and target:
httporhttps— forhttpstargets, certificates from the MkCert module work well — plus the localhost:portthat should receive the traffic, typically a site from the Local Sites & HTTPS module.
When you save a rule, FlyEnv writes both sides of the configuration through the Cloudflare API: it creates or updates a proxied CNAME record pointing the hostname at <tunnelId>.cfargotunnel.com, and pushes the tunnel's ingress rules — each hostname routed to its http(s)://host:port target with the Host header set, ending in a 404 catch-all for anything unmatched. Editing or deleting a rule updates the CNAME and ingress entries accordingly.
For a complete walkthrough of exposing a site you created through the Host guide workflow, see the Cloudflare Tunnel for local development guide.
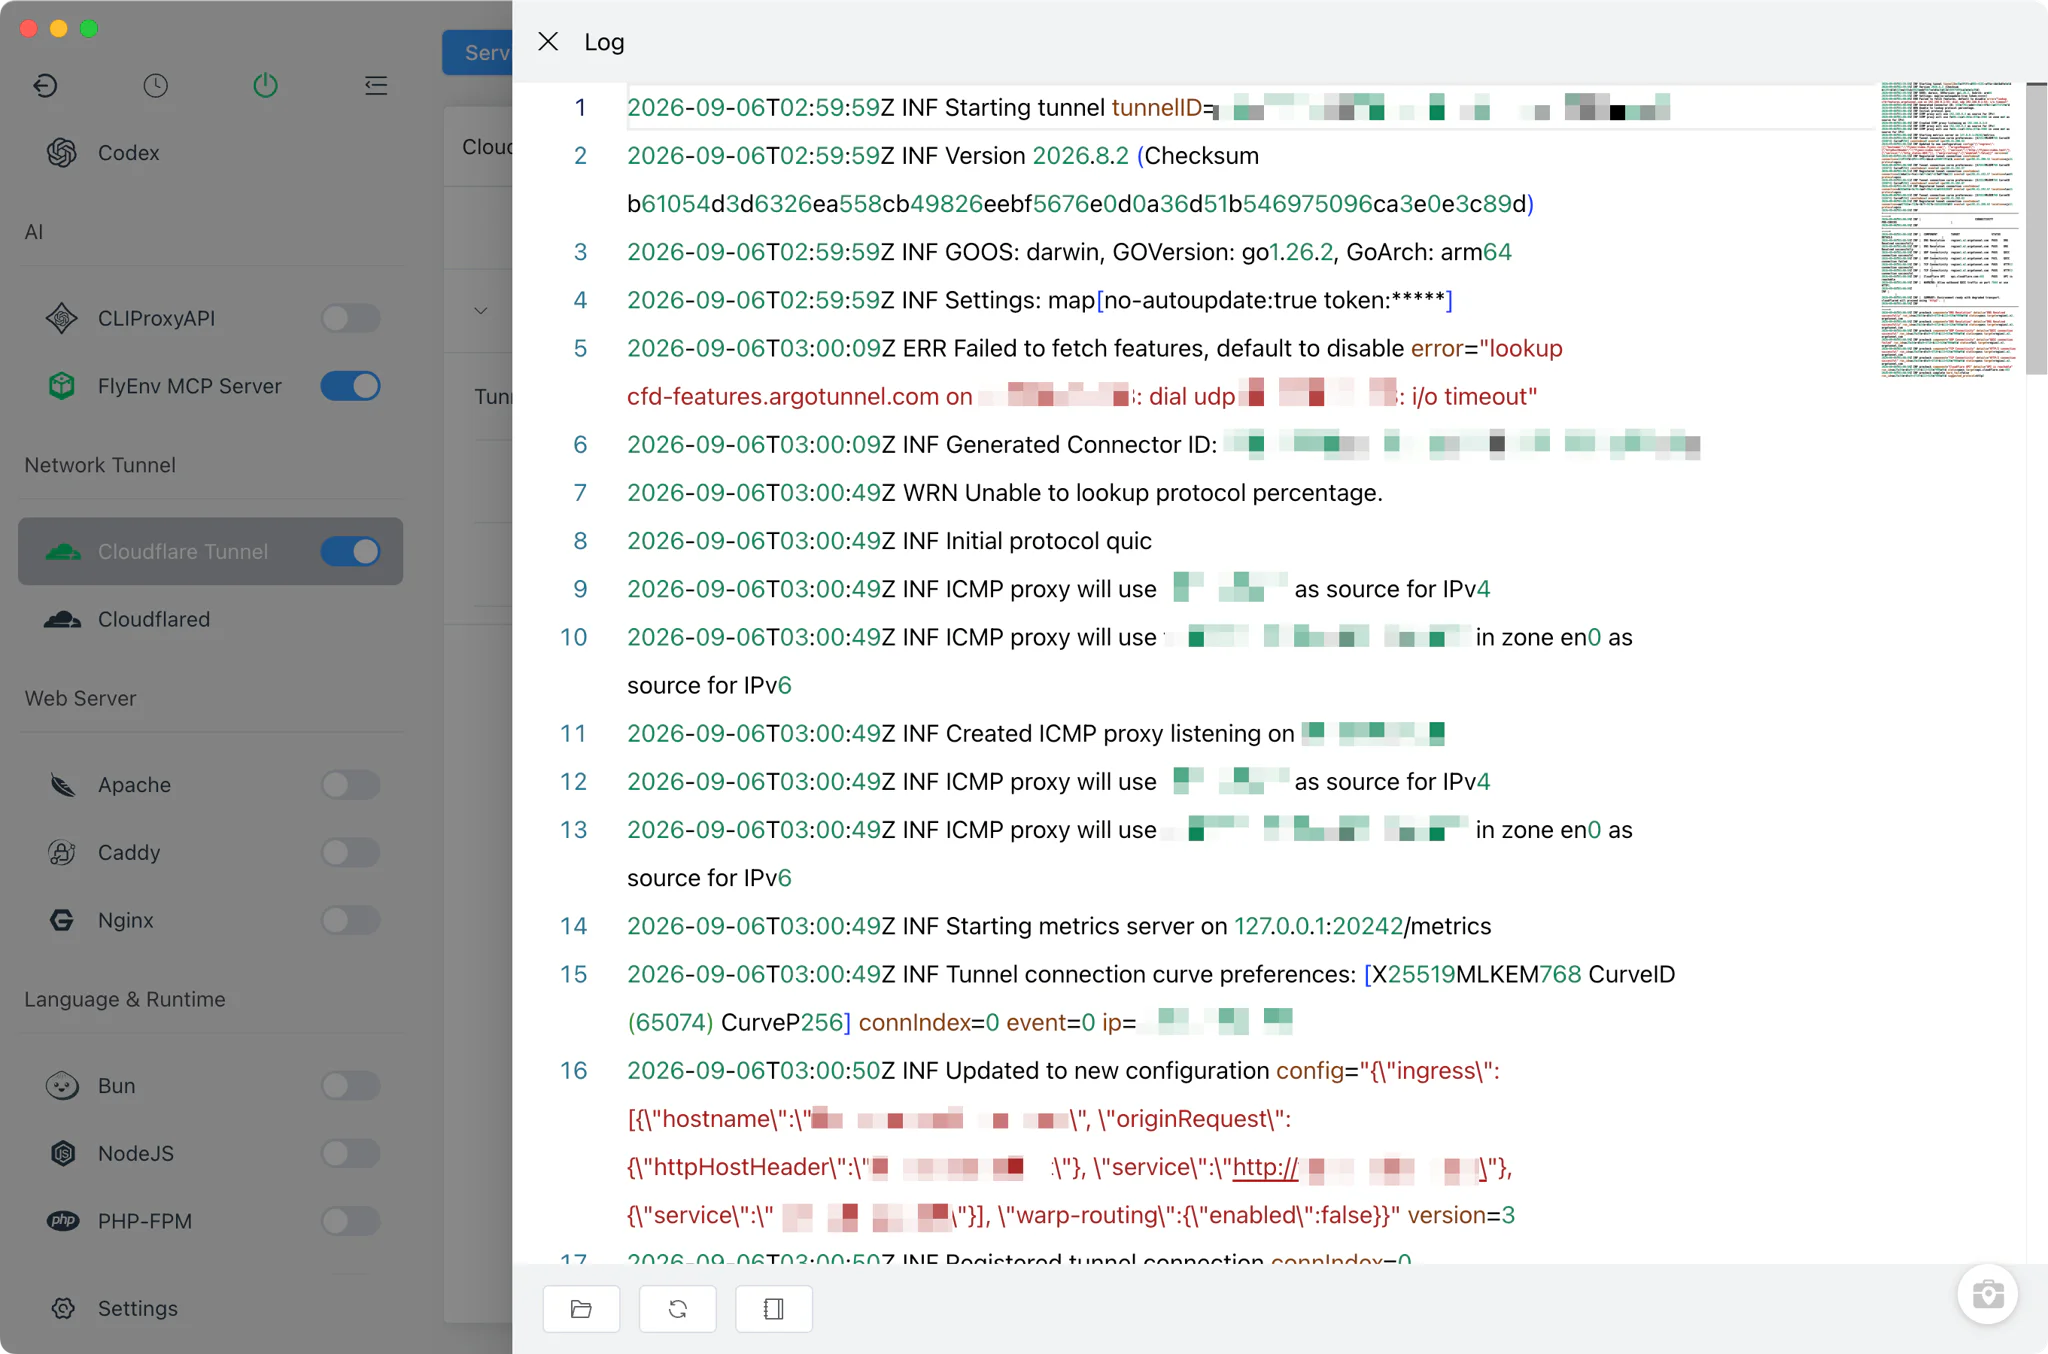
Tunnel logs
Every tunnel keeps its own output and error logs under FlyEnv's data directory, alongside its pid file. The built-in log viewer lists the log files per tunnel, so you can confirm that the connection to Cloudflare's edge is established and diagnose DNS or ingress problems without leaving the app.
Related guides, solutions and demos
Continue with a practical guide, solution, demo, or community perspective.
Compatibility Notes
The Cloudflare Tunnel module is available on macOS, Windows and Linux. It requires the Cloudflared module for the cloudflared binary, and a Cloudflare account with an API Token that can manage tunnels and DNS on the chosen zone. Because all configuration is stored on Cloudflare, changes made in the Cloudflare dashboard to the same tunnel can interact with what FlyEnv manages; treat FlyEnv as the single source of truth for its tunnels. See the Download page and release notes for the supported platforms and packages.