Podman Container Management in FlyEnv: Docker Alternative Without Root
Docker Desktop consuming too much RAM? Need to run legacy PHP 5.5 or MySQL 5.6 that no longer installs natively? Want container isolation without giving root access to your system?
Podman is the answer. And FlyEnv makes it as easy as clicking buttons.
Unlike Docker, Podman runs containers in rootless mode by default—no daemon running as root, no security risks from container escapes. Combined with FlyEnv's visual interface, you get all the benefits of containerization without the complexity.
Why Use Podman Instead of Docker?
Docker Desktop Problems
| Issue | Docker Desktop | Podman + FlyEnv |
|---|---|---|
| Resource usage | 2-4GB RAM idle | 200-500MB |
| Root privileges | Daemon runs as root | Rootless by default |
| Subscription | $5-21/month for companies | Completely free |
| Vendor lock-in | Docker-only ecosystem | OCI-compliant (interoperable) |
| Complexity | Many components | Single binary |
When to Use Containers in FlyEnv
1. Legacy Software Support
Need PHP 5.5 or MySQL 5.6 for an old project? Modern package managers (Homebrew, MacPorts) dropped support years ago. Podman containers preserve these versions indefinitely:
# docker-compose.yml for legacy stack
version: '3'
services:
  php55:
    image: php:5.5-apache
    volumes:
      - ./legacy-app:/var/www/html

  mysql56:
    image: mysql:5.6
    environment:
      MYSQL_ROOT_PASSWORD: root
2. Isolated Development Environments
Test untrusted code without risk:
- Downloaded a sketchy GitHub repo? Run it in a container.
- Client's old WordPress site with suspicious plugins? Containerize it.
- Experimenting with new software? Isolate from your main system.
3. Docker Compose Projects
Already have a docker-compose.yml? Import and run it directly—no changes needed.
Getting Started with Podman in FlyEnv
Prerequisites
FlyEnv 4.11.0+ includes the Podman module. No separate installation required.
Supported platforms:
- macOS (Intel & Apple Silicon)
- Windows (via WSL2)
- Linux
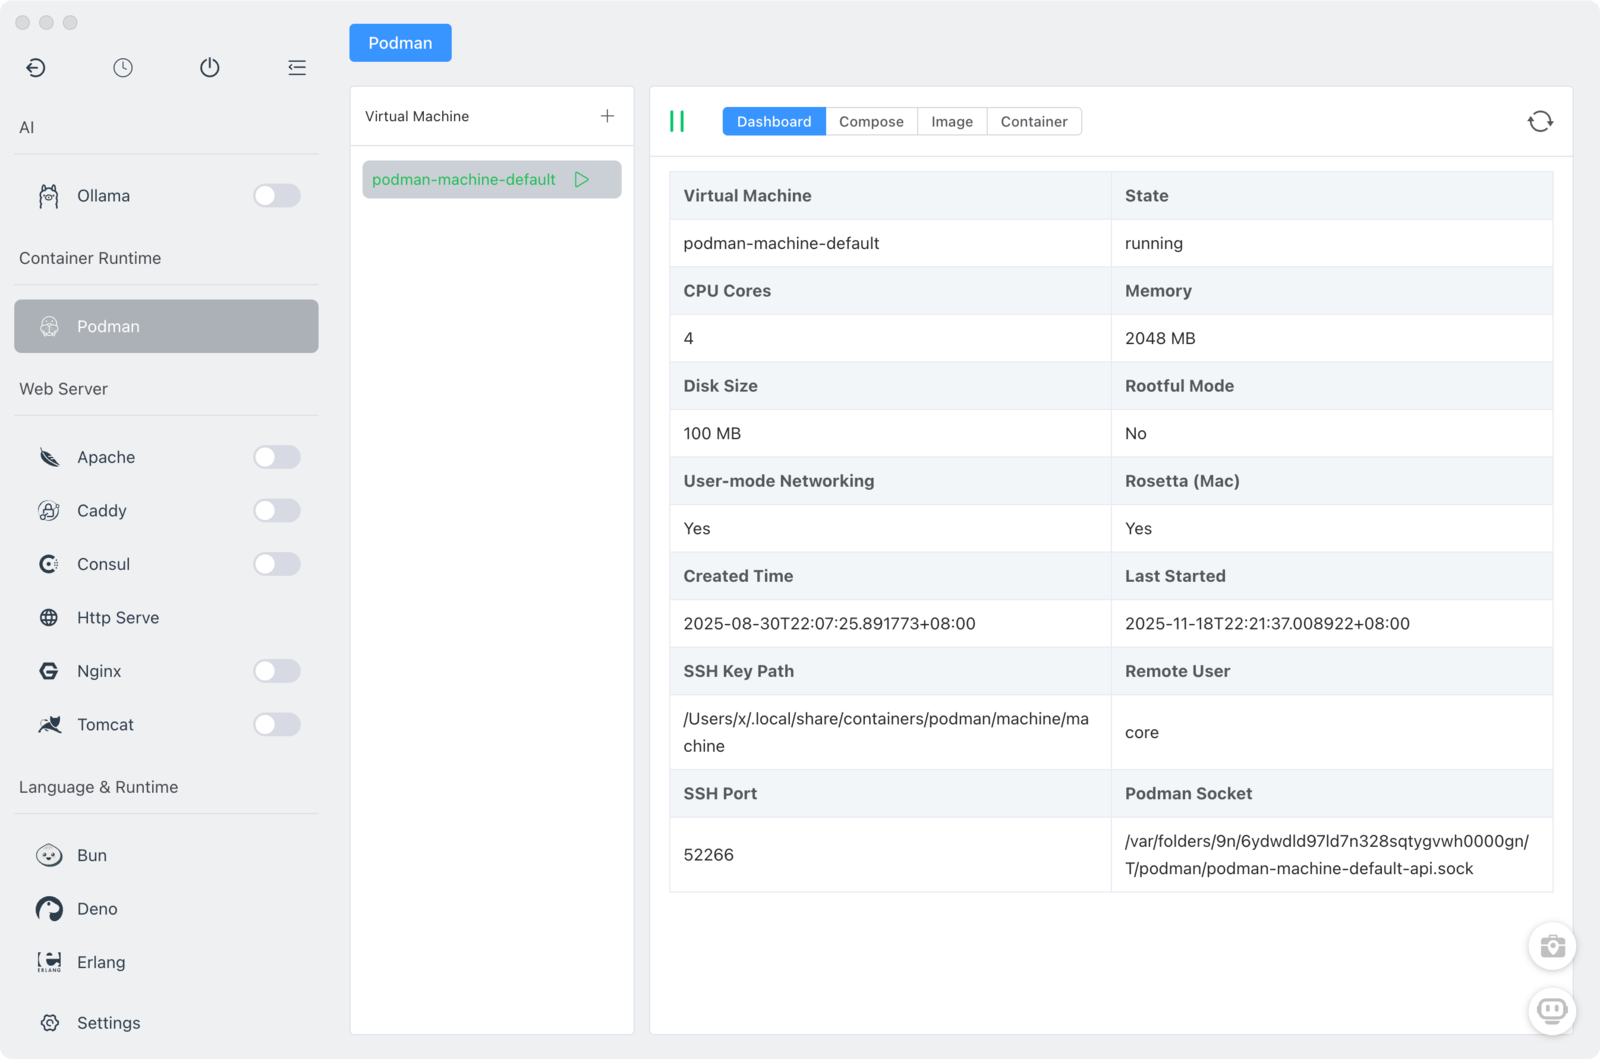
Creating Your First VM
Podman on macOS/Windows requires a Linux VM. FlyEnv handles this automatically:
- Open FlyEnv → Podman module
- Go to VM tab
- Click "Create VM"
- Configure resources:
- CPU: 2-4 cores (default: 2)
- Memory: 2-8GB (default: 2GB)
- Disk: 20-100GB (default: 50GB)
- Click Create and wait for provisioning
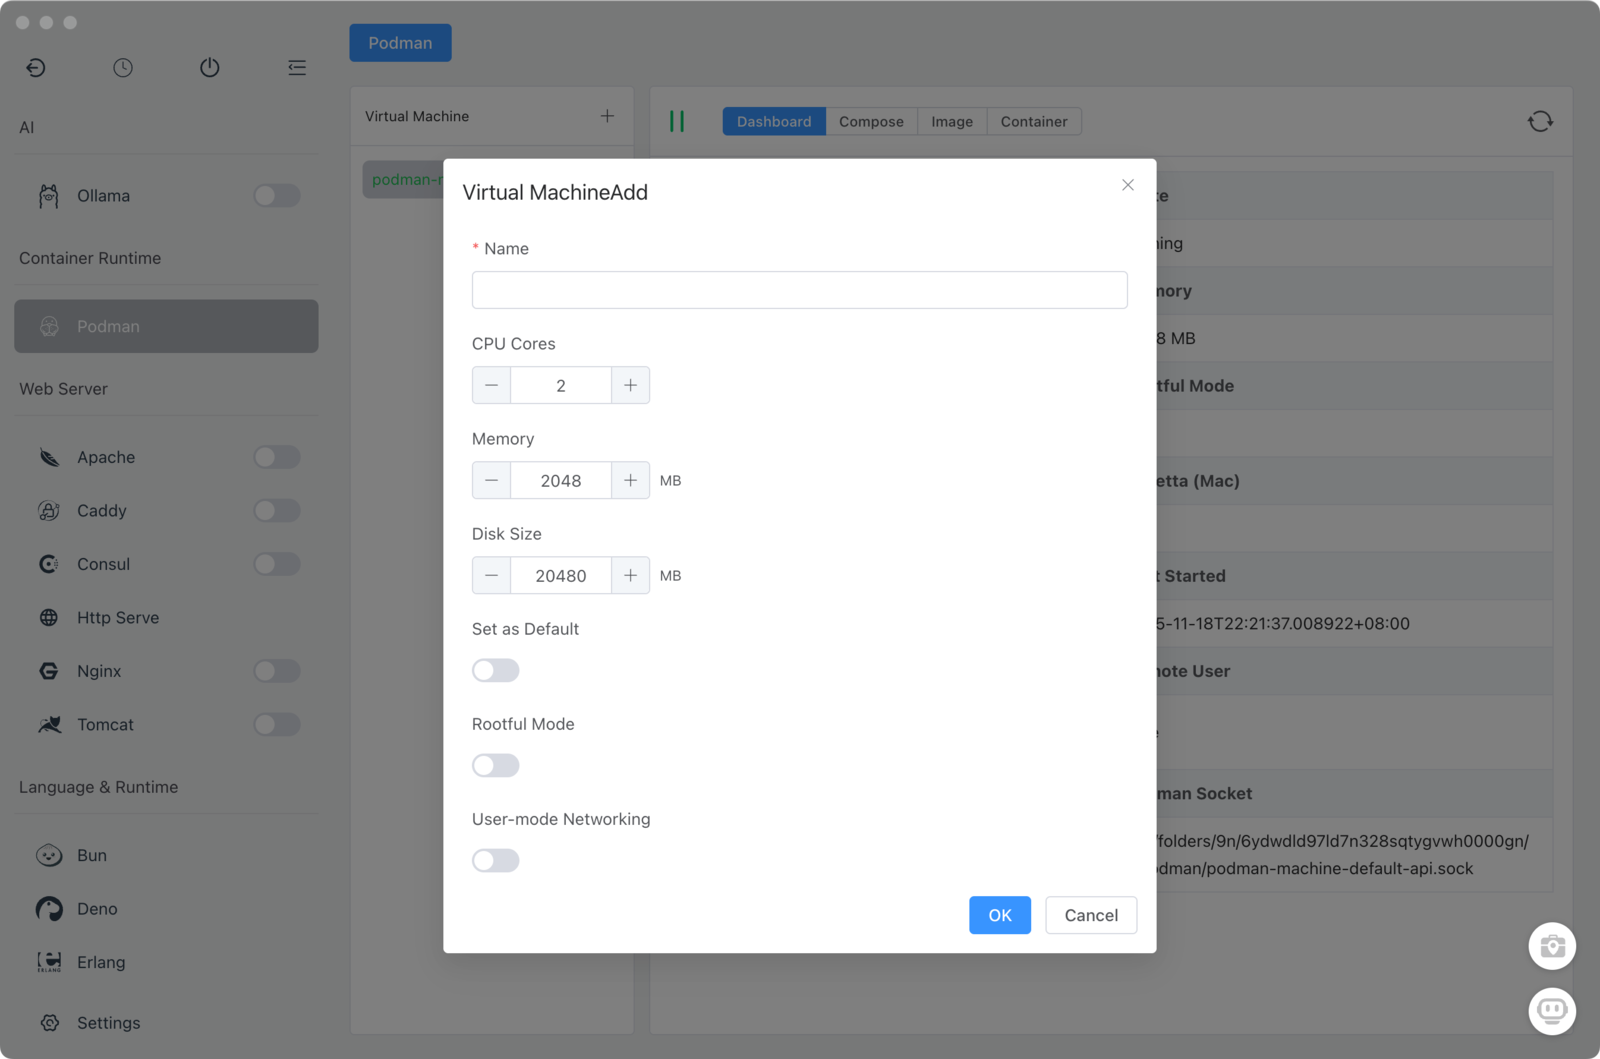
- Select the VM and click Start
Quick Start with Templates
FlyEnv provides pre-configured templates for common stacks:
| Template | Includes | Use Case |
|---|---|---|
| LAMP | Apache + PHP + MySQL | Legacy PHP applications |
| LEMP | Nginx + PHP + MySQL | Modern PHP frameworks |
| Node.js | Node + MongoDB | JavaScript applications |
| Redis | Redis server | Caching layer |
| PostgreSQL | Postgres + pgAdmin | Database development |
To use a template:
- Go to Compose tab
- Click "From Template"
- Select a template
- Choose destination folder
- Click Create
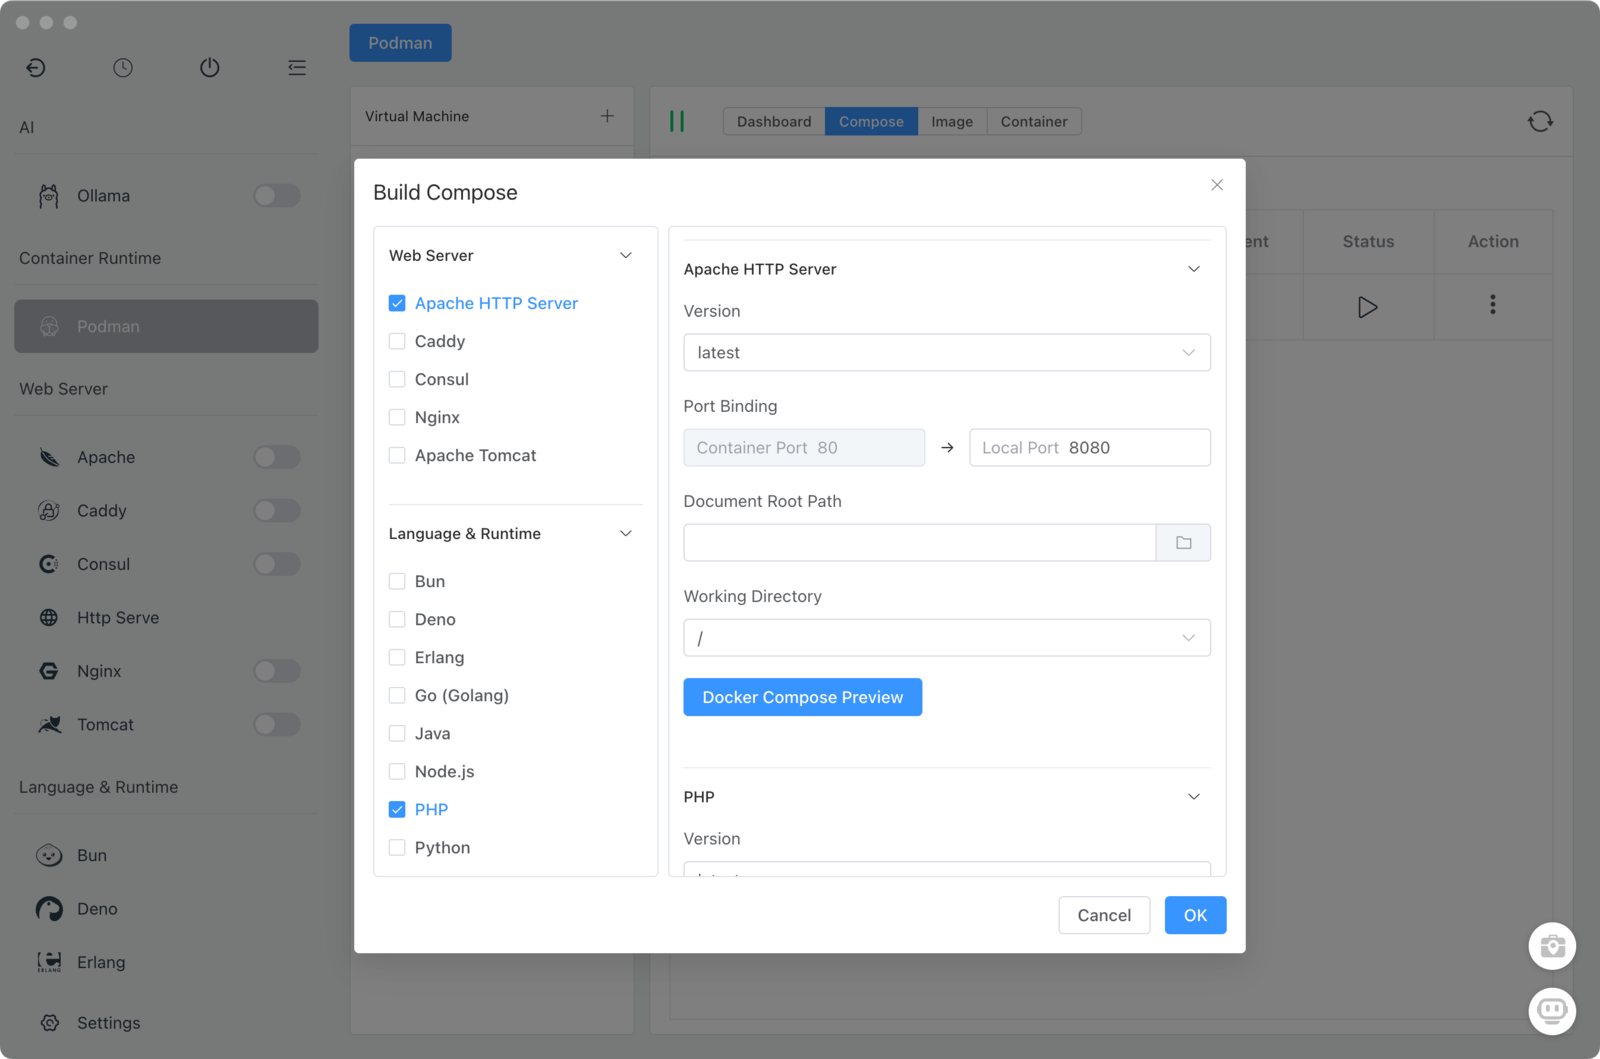
The template generates a ready-to-run docker-compose.yml.
Managing Docker Compose Projects
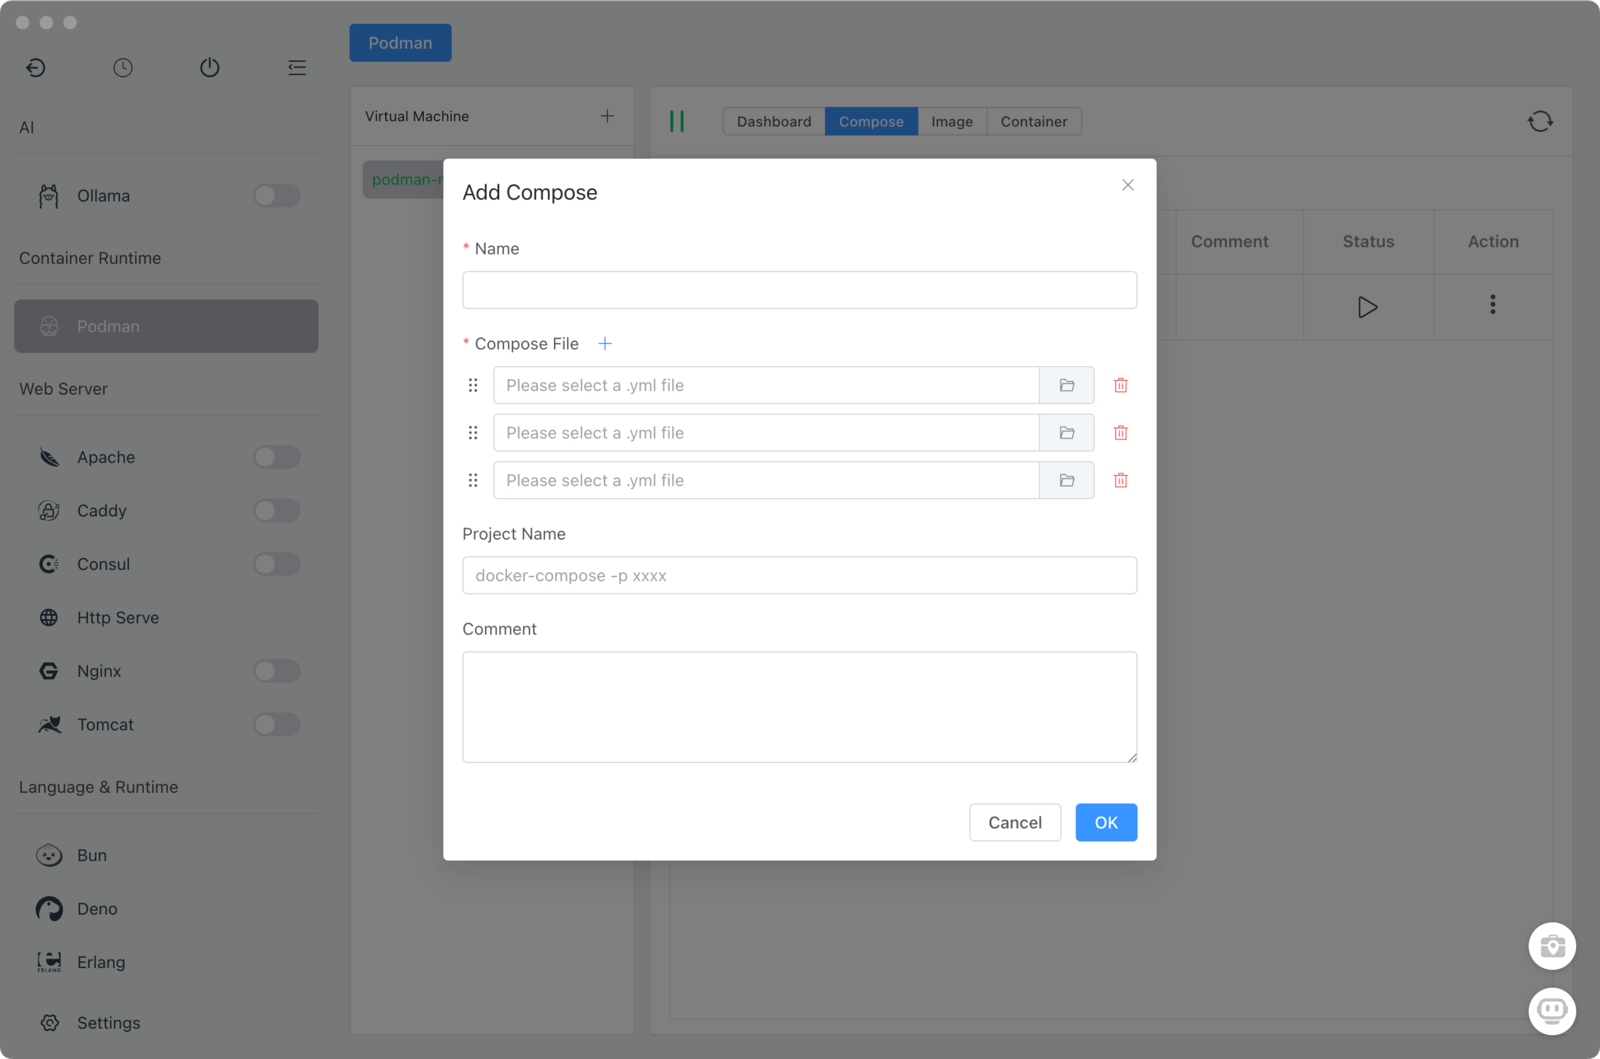
Import Existing Projects
Already have a docker-compose.yml? Import it in seconds:
- Compose tab → "Import"
- Select your
docker-compose.ymlfile - Project appears in the list
- Click Start to launch all services
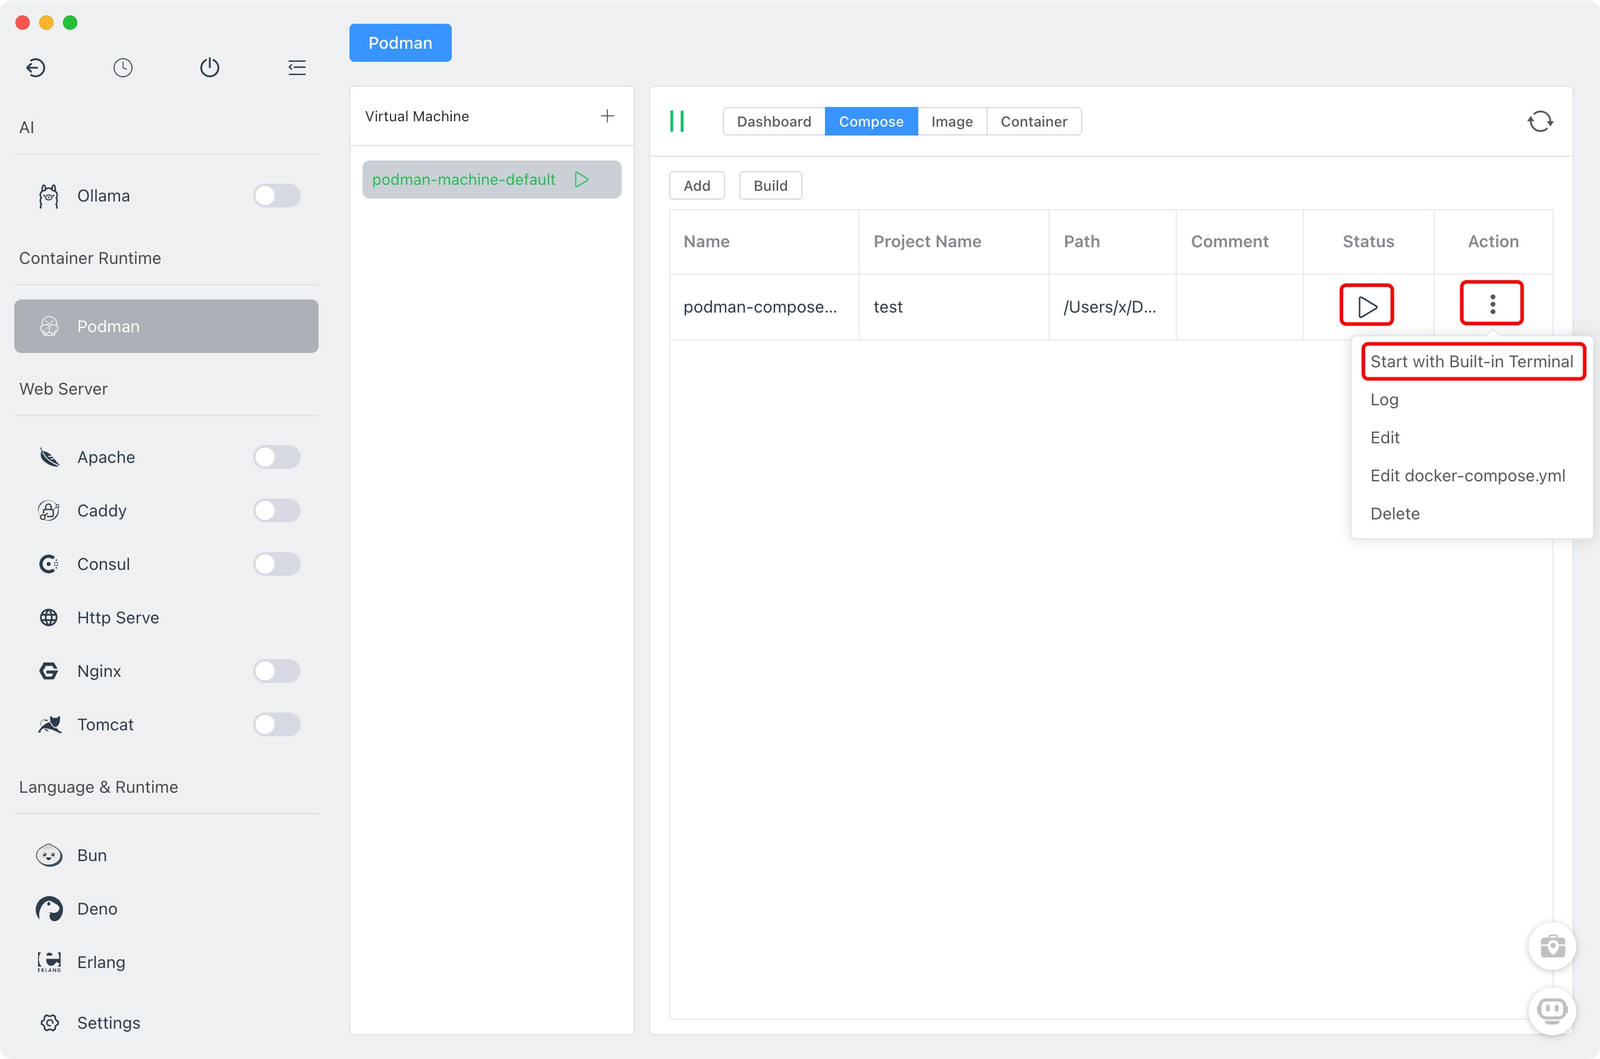
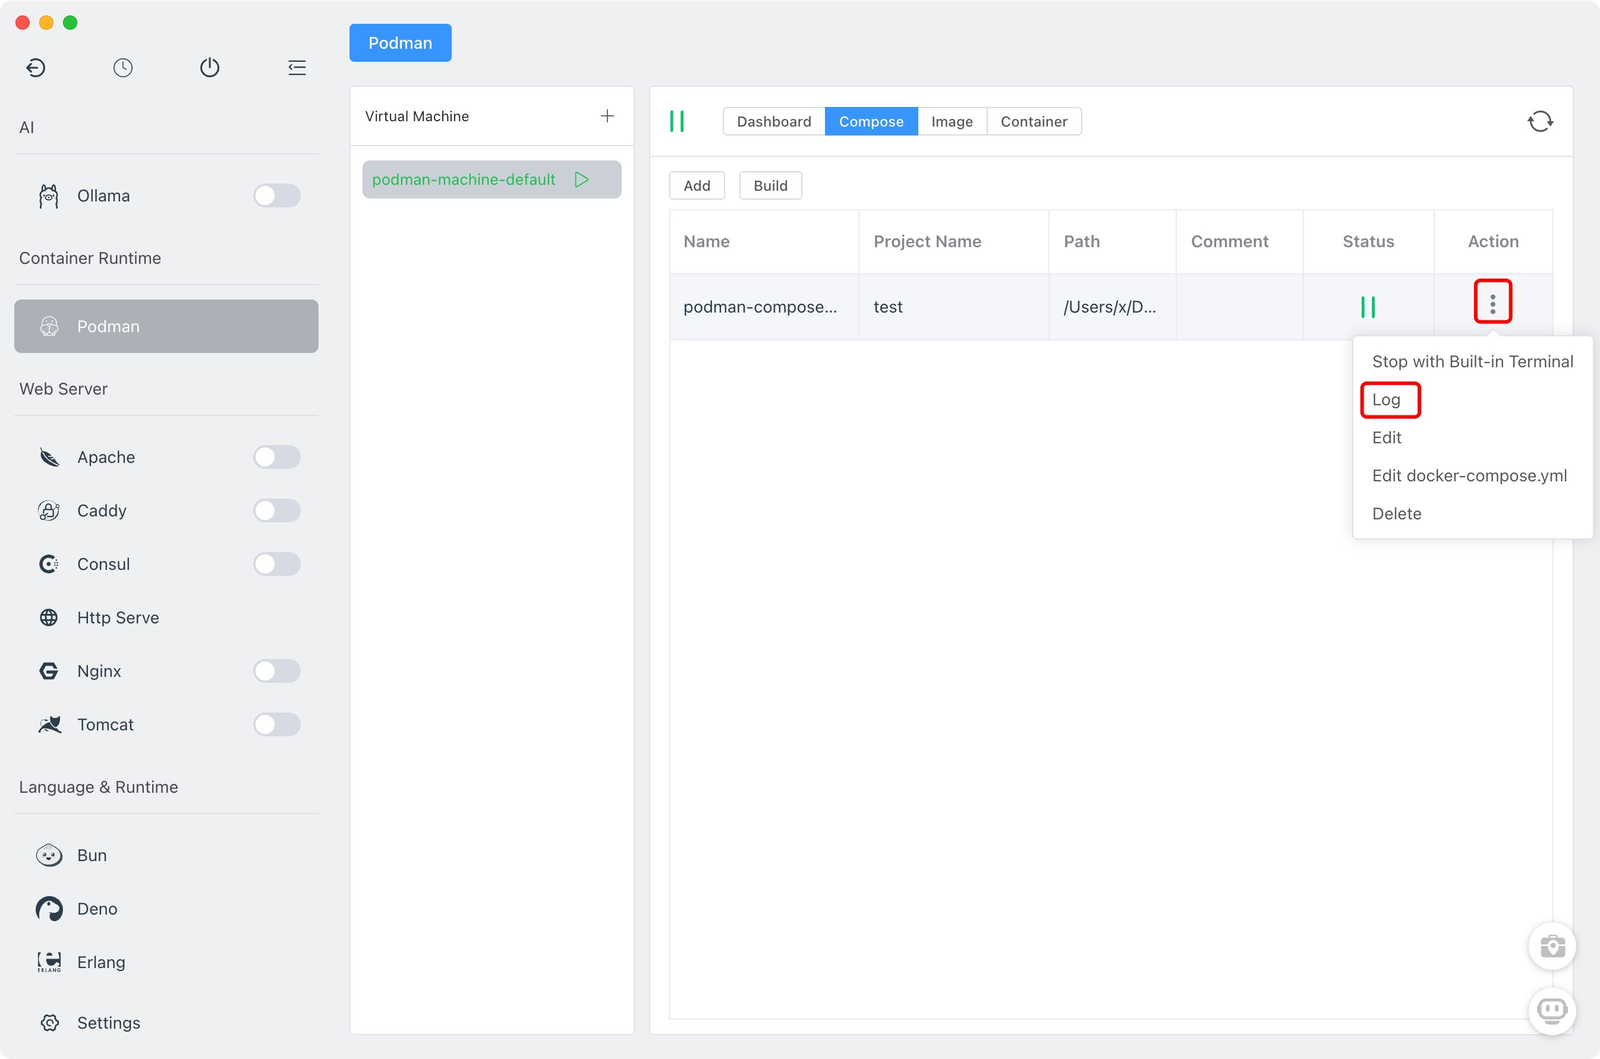
Managing Running Projects
The Compose management view shows:
- Running/stopped status
- Individual service status
- Port mappings
- Volume mounts
Actions:
- Start/Stop: Control entire stack
- Restart: Restart specific services
- Logs: View real-time logs per service
- Delete: Remove stack (keeps files)
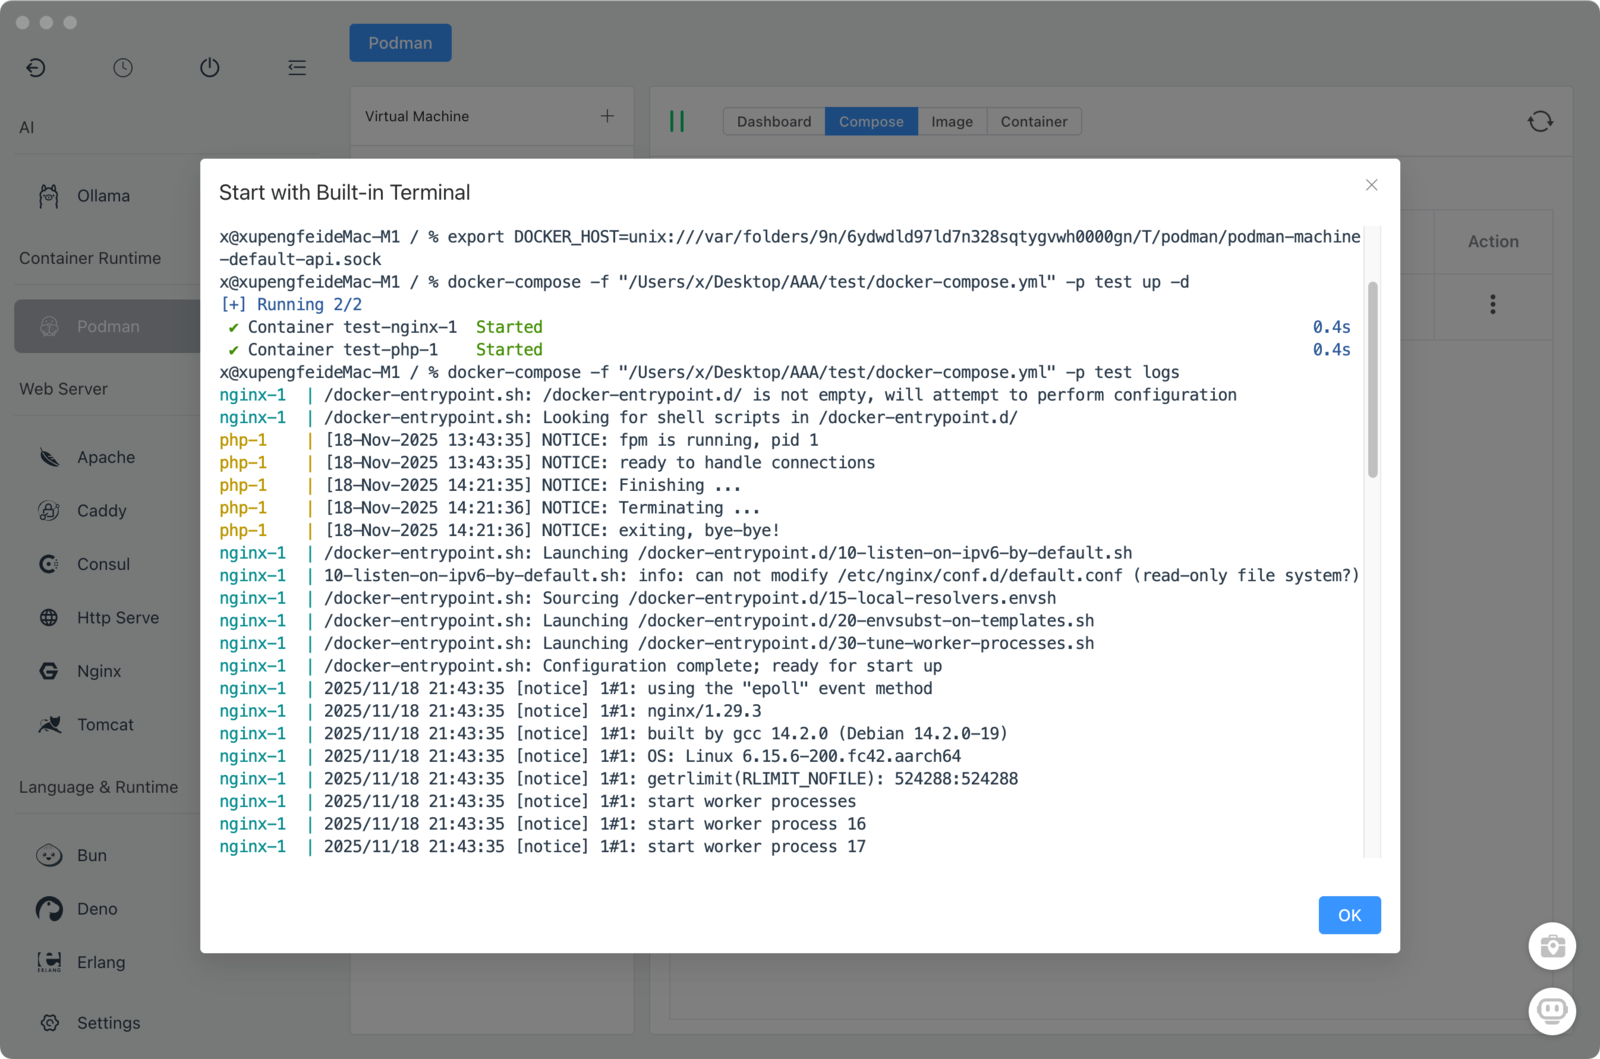
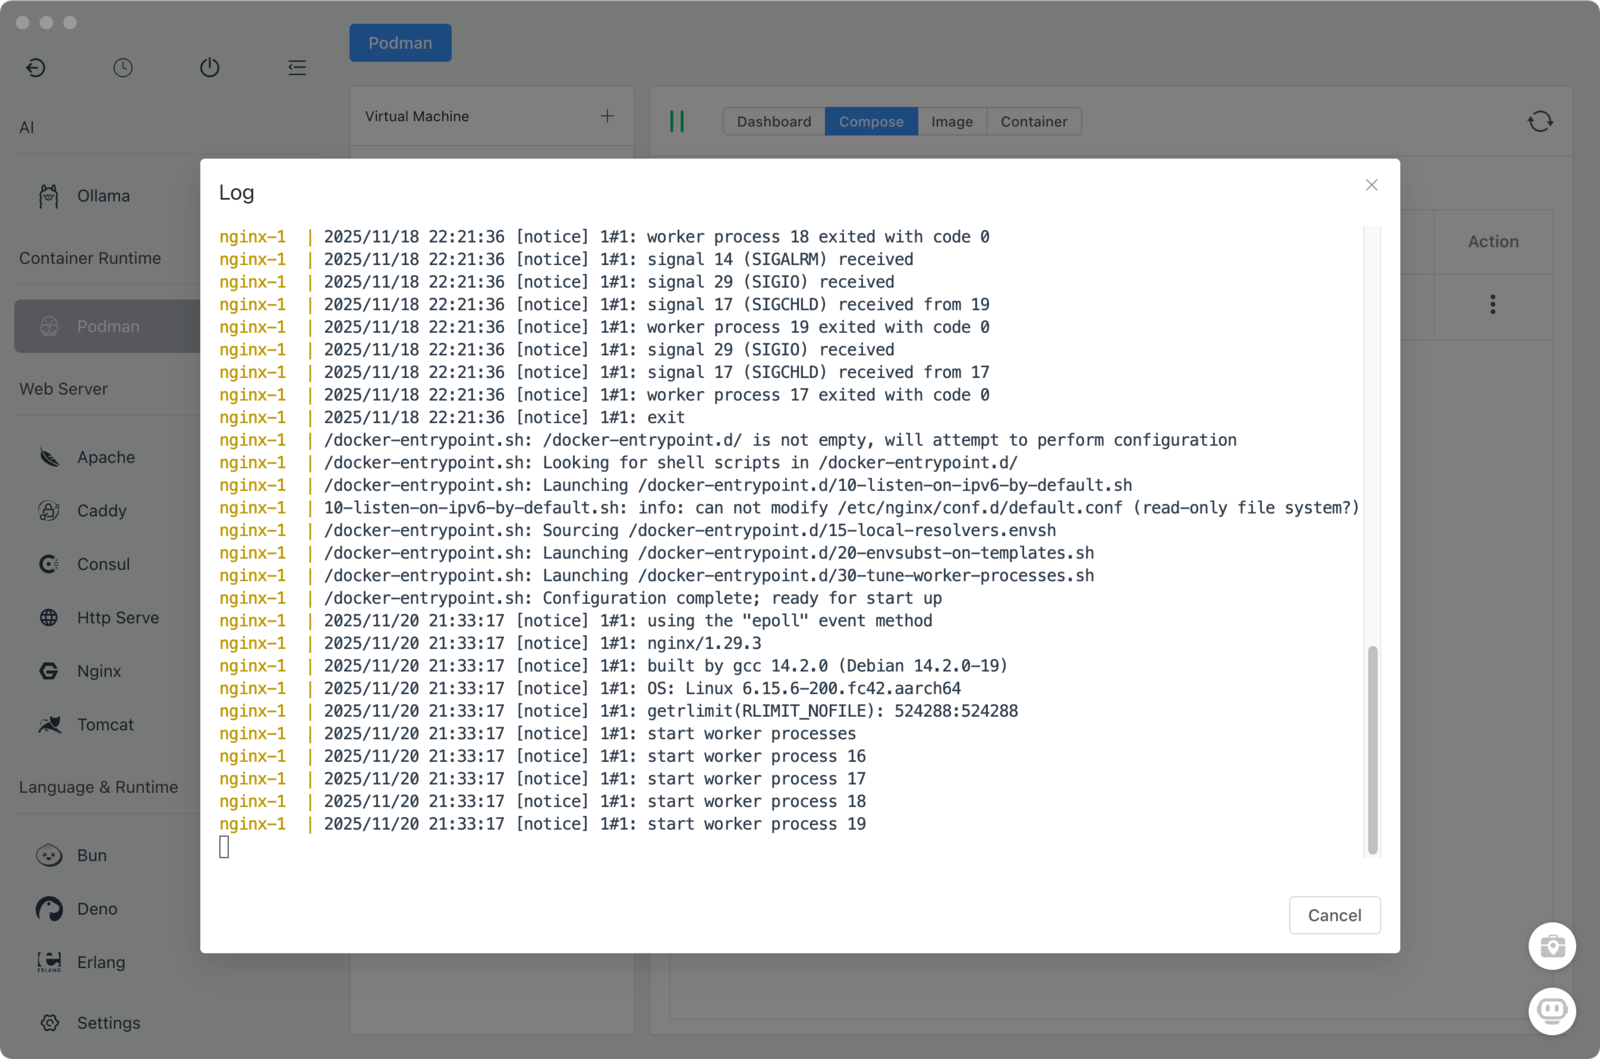
Viewing Logs
- Select a compose project
- Click Logs tab
- Select service from dropdown
- View real-time output
Filter by:
- All services
- Specific service
- Search keywords
Container Management
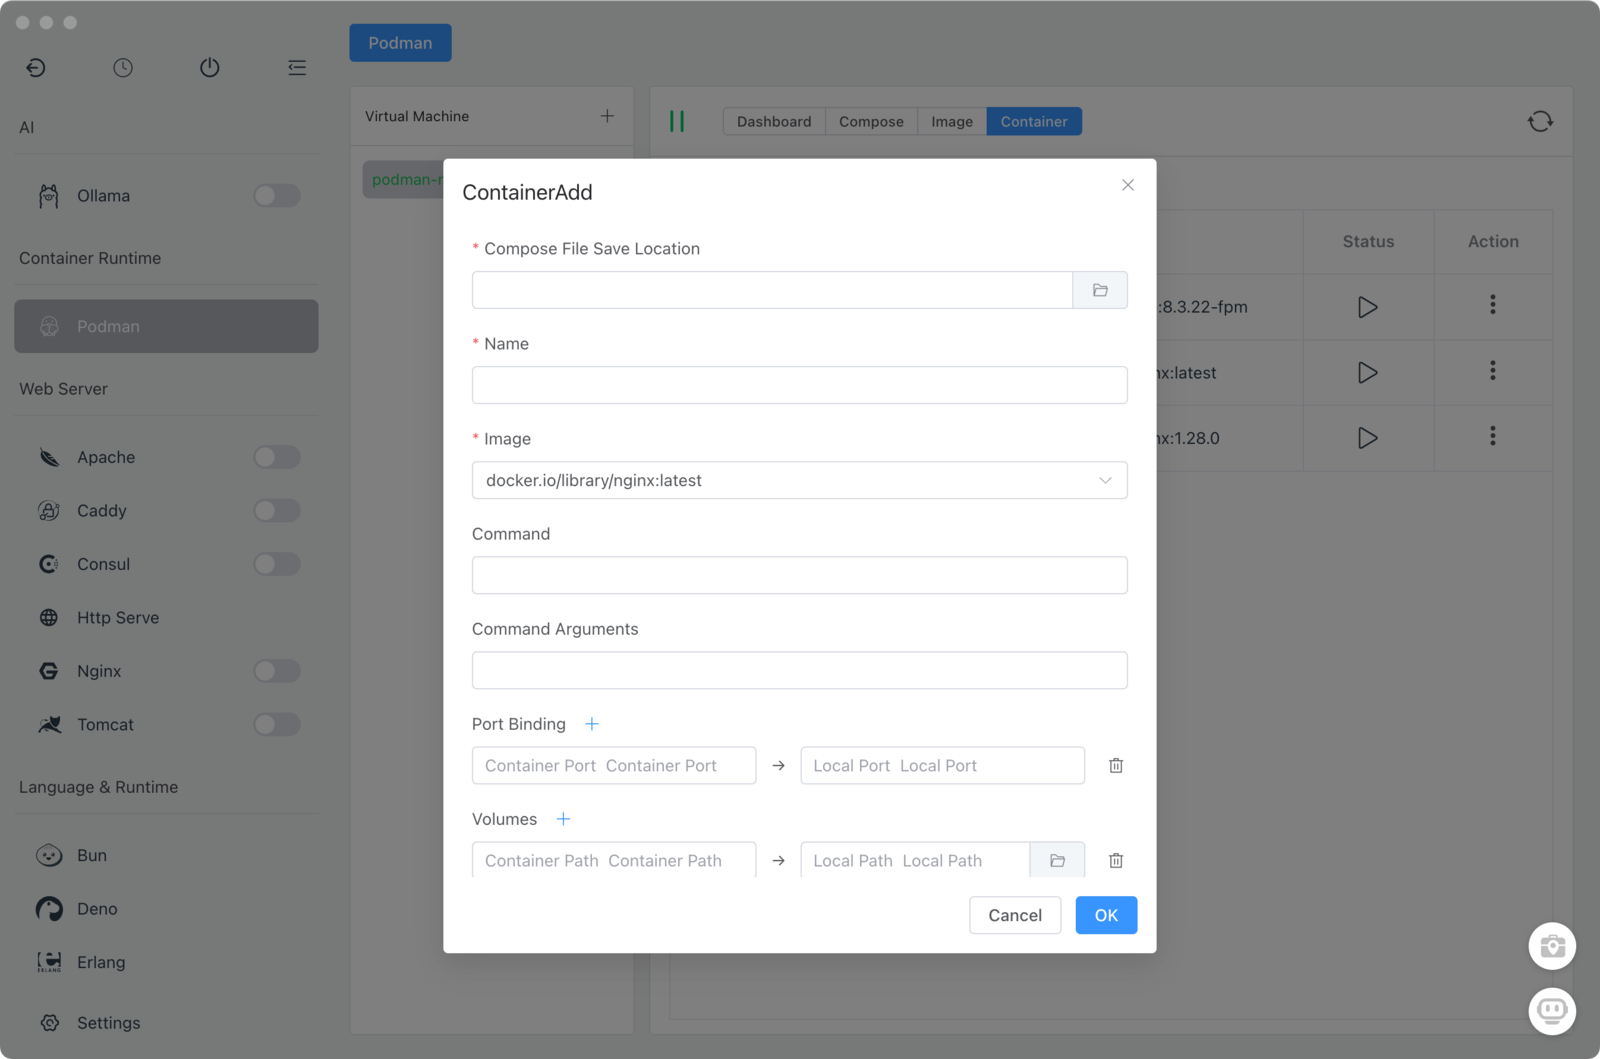
Creating Containers
For single containers (without Compose):
- Containers tab → "Add"
- Configure:
- Image: Select or type (e.g.,
nginx:latest) - Name: Container identifier
- Ports: Host:Container mappings
- Volumes: Host folder:Container path
- Environment: Environment variables
- Image: Select or type (e.g.,
- Click Create
Container Operations
| Action | Description | When to Use |
|---|---|---|
| Start/Stop | Control runtime | Daily operations |
| Restart | Stop then start | Apply config changes |
| Delete | Remove container | Cleanup unused containers |
| Export | Save to file | Backup or transfer |
| Commit | Save as image | Preserve modifications |
| Exec | Open shell | Run commands inside |
Executing Commands in Containers
Need to run a command inside a running container?
- Select container
- Click "Exec"
- Choose shell (
/bin/bashor/bin/sh) - Run commands interactively

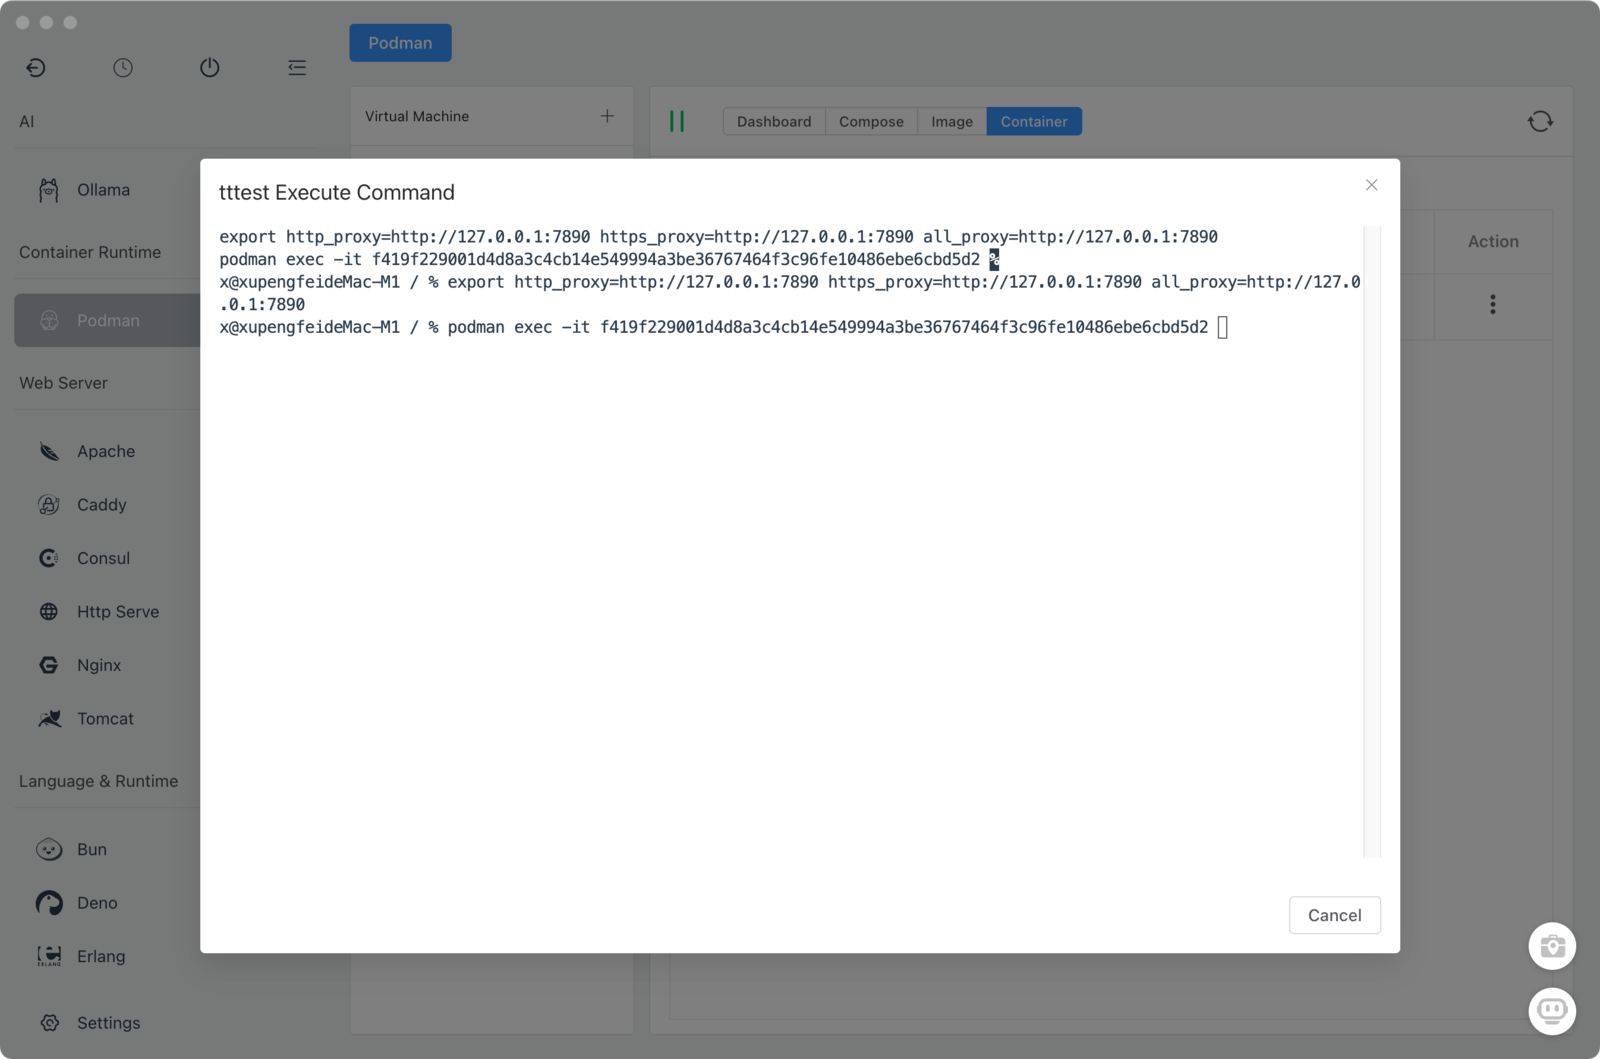
Common commands:
# Check PHP version
php -v

# Install packages
apt-get update && apt-get install -y vim

# Check running processes
ps aux

# View environment variables
env
Image Management
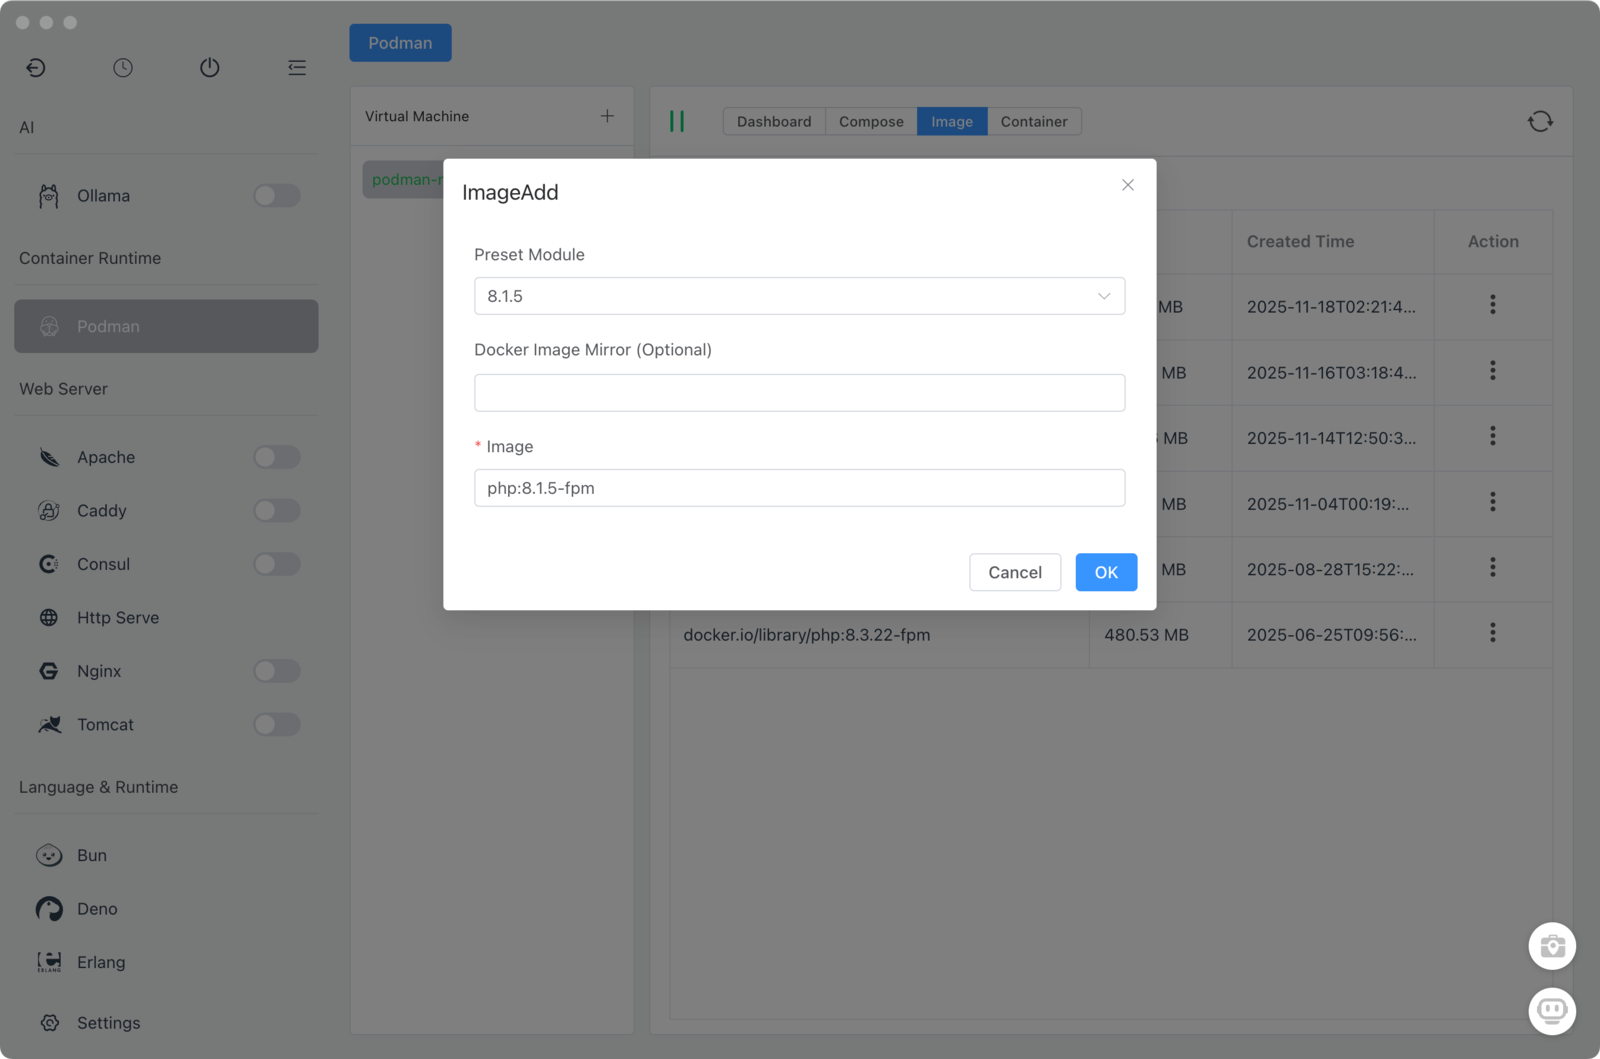
Pulling Images
- Images tab → "Pull"
- Enter image name and tag:
nginx:latestphp:8.2-apachemysql:8.0
- Click Pull
Images download from Docker Hub or your configured registry.
Managing Local Images
The Images tab shows:
- Repository name
- Tag/version
- Size on disk
- Creation date
Actions:
- Run: Create container from image
- Delete: Remove to free space
- Export: Save as tar file
- Import: Load from tar file
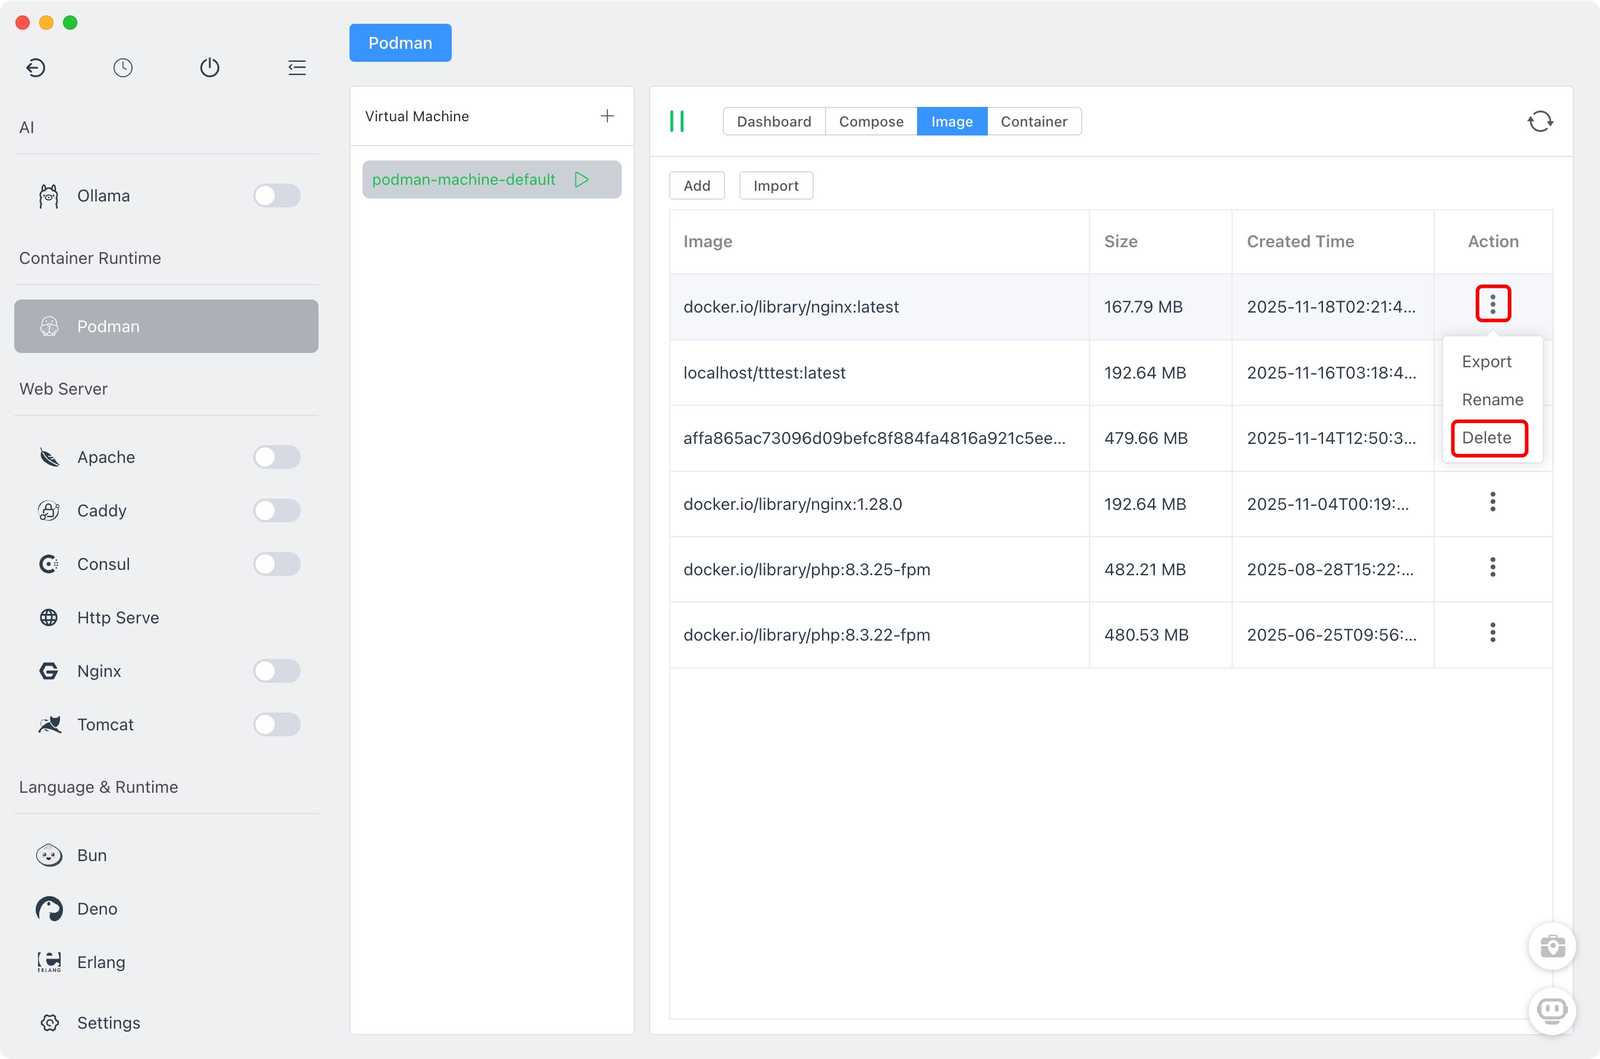
Space saving tip: Remove unused images regularly. A typical image is 100MB-1GB.
Real-World Use Cases
Running Legacy PHP 5.5
A client has a 10-year-old WordPress site that only runs on PHP 5.5:
version: '3'
services:
  wordpress:
    image: php:5.5-apache
    volumes:
      - ./client-site:/var/www/html
    ports:
      - "8080:80"

  mysql55:
    image: mysql:5.5
    environment:
      MYSQL_ROOT_PASSWORD: root
MYSQL_DATABASE: wordpress- Save as
docker-compose.yml - Import to FlyEnv Podman
- Start services
- Access at
http://localhost:8080
Isolating Untrusted Code
Downloaded a sketchy script from Stack Overflow?
# Instead of running directly on your machine...
# Run in a throwaway container

1. Create container with `ubuntu:latest`
2. Mount only the script folder
3. Run the script
4. Delete container when done
Your host system remains untouched.
Testing Software Without Installation
Want to try Elasticsearch without complex setup?
- Pull
elasticsearch:8.ximage - Create container with port 9200 mapped
- Test your application
- Delete when done—no cleanup needed
Troubleshooting
"VM not starting" (macOS/Windows)
Causes:
- Insufficient disk space for VM
- Virtualization not enabled in BIOS (Windows)
- Another VM conflicting
Solutions:
- Free up disk space (at least 20GB)
- Enable virtualization in BIOS/UEFI
- Stop other VM software (VirtualBox, VMware)
"Cannot connect to Docker daemon"
Cause: VM not running
Solution: Start the VM in Podman module first.
"Port already in use"
Cause: Host port conflicts with another service
Solution: Change host port in container/compose configuration:
ports:
  - "8080:80"  # Instead of 80:80
"Permission denied" when accessing volumes
Cause: Rootless container permissions
Solution:
- Use named volumes instead of bind mounts
- Or set correct UID/GID in container options
Slow performance on macOS
Cause: Filesystem translation overhead
Solutions:
- Use
:cachedor:delegatedmount flags - Exclude
node_modulesfrom mounts - Use SSD for VM storage
Podman vs Docker Desktop: Feature Comparison
| Feature | Docker Desktop | Podman + FlyEnv |
|---|---|---|
| Rootless | ❌ No | ✅ Yes |
| Daemon | Required | Daemonless |
| Docker Compose | ✅ Yes | ✅ Yes |
| Image compatibility | Docker Hub | Docker Hub + OCI |
| Resource usage | 2-4GB | 200-500MB |
| Cost | $5-21/mo (business) | Free |
| Kubernetes | Built-in | Via minikube |
| GUI management | Dashboard only | Full integration |
Frequently Asked Questions (FAQ)
Q: Can I use Docker Hub images with Podman?
A: Yes. Podman is fully compatible with Docker Hub and OCI-compliant registries. Pull and run any public Docker image.
Q: Do I need to learn new commands?
A: No. Podman CLI is compatible with Docker. podman run = docker run, podman ps = docker ps, etc. But with FlyEnv's GUI, you rarely need the CLI.
Q: Is Podman slower than Docker?
A: No. Performance is comparable. On Linux, Podman is often faster due to no daemon overhead. On macOS/Windows, both use VMs so performance is similar.
Q: Can I migrate existing Docker projects?
A: Yes. Docker Compose files work without modification. Simply import and run.
Q: Does it work with VS Code Dev Containers?
A: Yes. Install the Podman CLI and configure VS Code to use it instead of Docker.
Q: How do I access containers from my local network?
A: Map ports when creating containers (e.g., host 8080 → container 80). Then access via http://localhost:8080.
Q: Can I run GUI applications in containers?
A: Yes, with additional configuration for X11 forwarding (macOS/Linux). Generally better suited for server applications.
Q: What's the difference between a VM and a container?
A: In FlyEnv's Podman module: VM is the Linux virtual machine (macOS/Windows only). Containers run inside the VM. On Linux, containers run directly without VM.
Q: How much disk space do I need?
A: VM: 20-50GB. Each image: 100MB-1GB typical. Plan for 100GB total for comfortable usage.
Summary
FlyEnv's Podman module bridges the gap between native development and containerization:
- ✅ Run legacy software no longer available in package managers
- ✅ Isolate untrusted code without risk to your system
- ✅ Deploy Docker Compose projects with one click
- ✅ Rootless by default for better security
- ✅ Free forever no subscription fees
Ready to reduce your Docker Desktop resource usage? Try Podman in FlyEnv today.
Download FlyEnv — Available for macOS, Windows, and Linux
Explore more features:
- Custom Domains & SSL — Professional local development
- Reverse Proxy Setup — Connect containers to web servers
- FlyEnv vs Docker — Full comparison