使用Xdebug调试PHP
安装Xdebug扩展
macOS && Linux
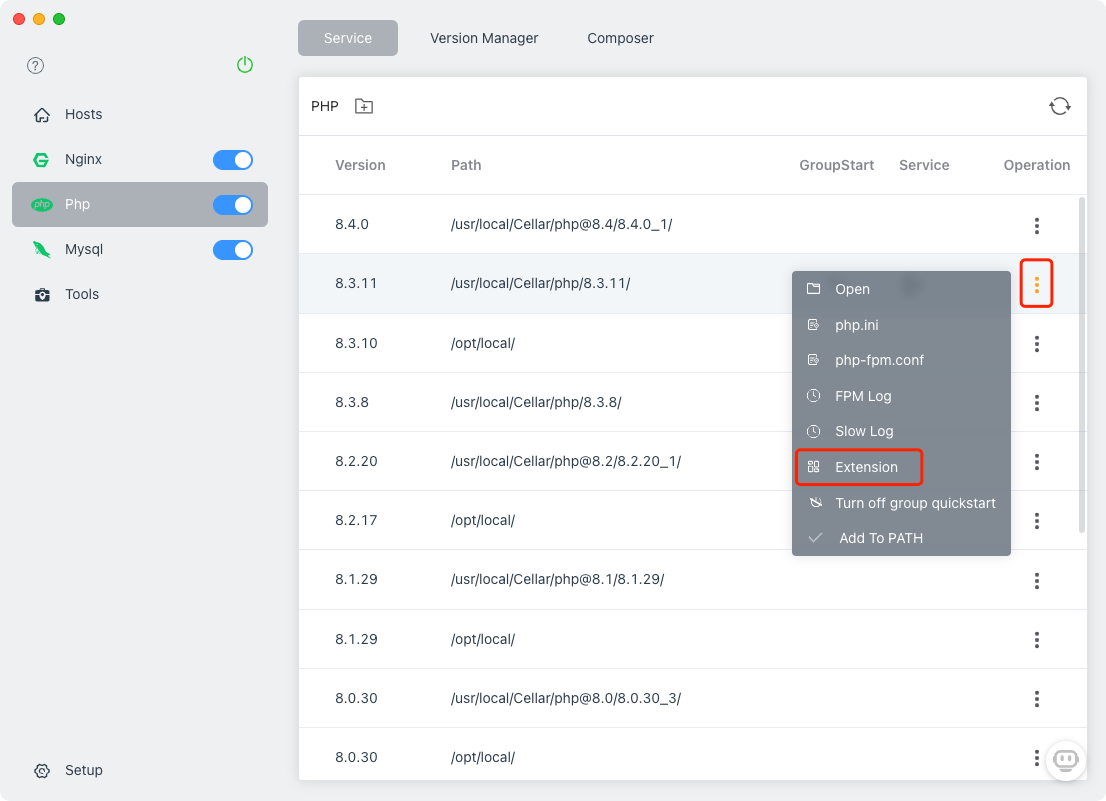
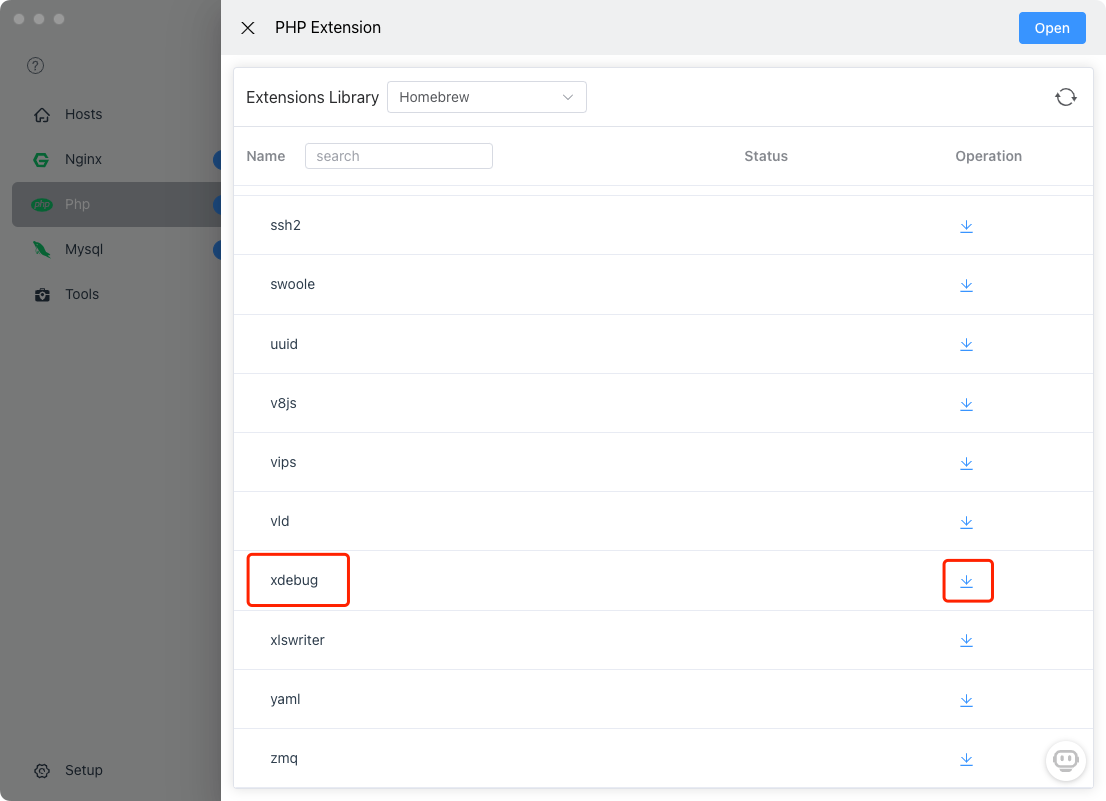
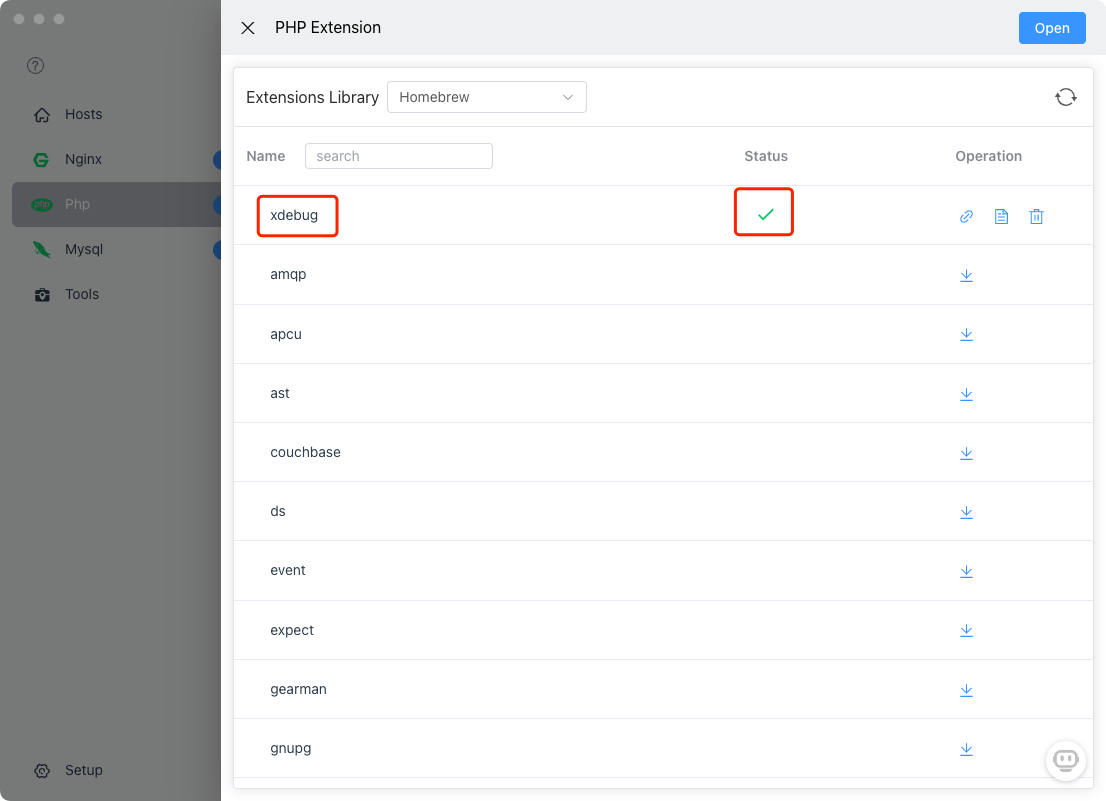
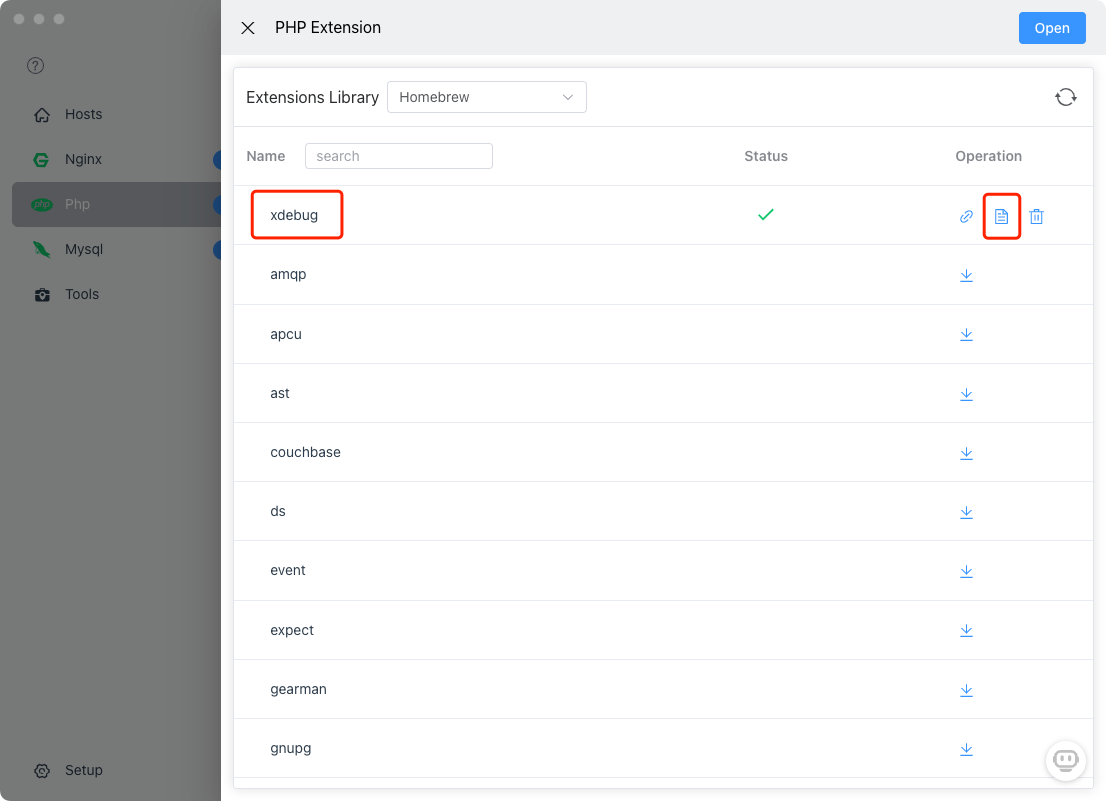
FlyEnv提供了一键安装 Xdebug 扩展
Windows
目前需要手动下载xdebug.dll. 点击'扩展'按钮打开pecl站点和 PHP 扩展文件夹
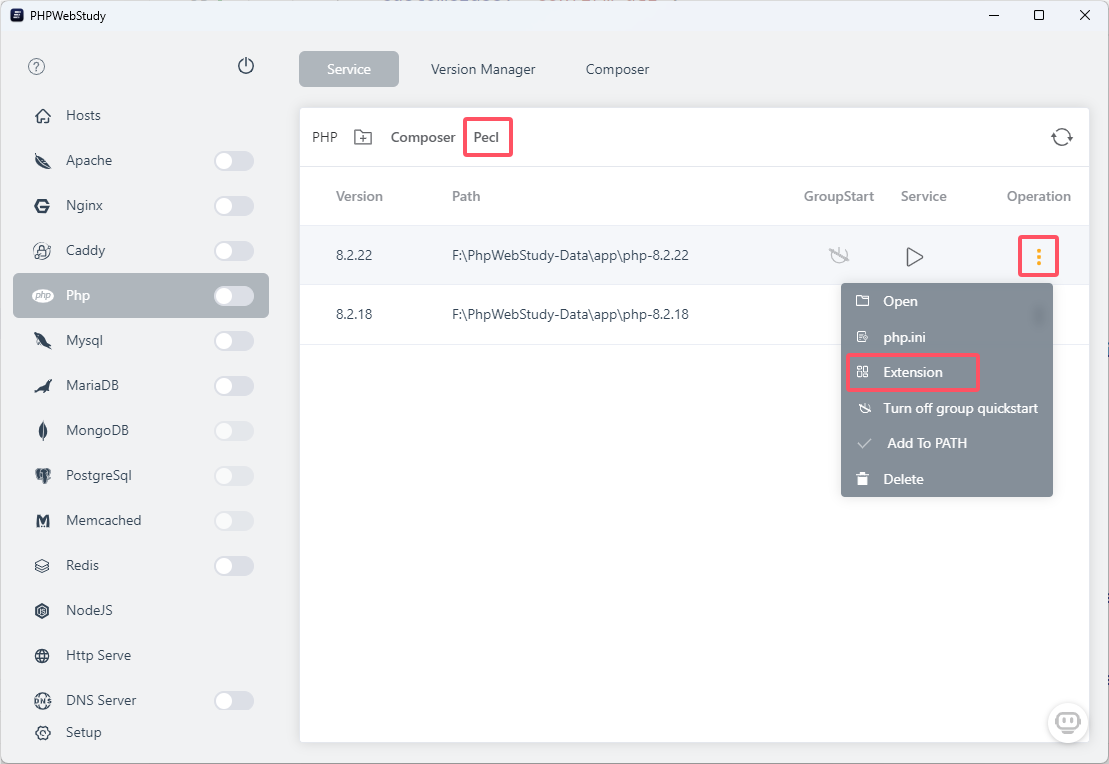
在https://pecl.php.net/package/xdebug下载xdebug.dll. 然后把xdebug.dll放到 PHP 扩展文件夹
在php.ini中配置Xdebug
FlyEnv提供了一个快速配置的模板。只需单击复制按钮并将内容粘贴到php.ini文件中
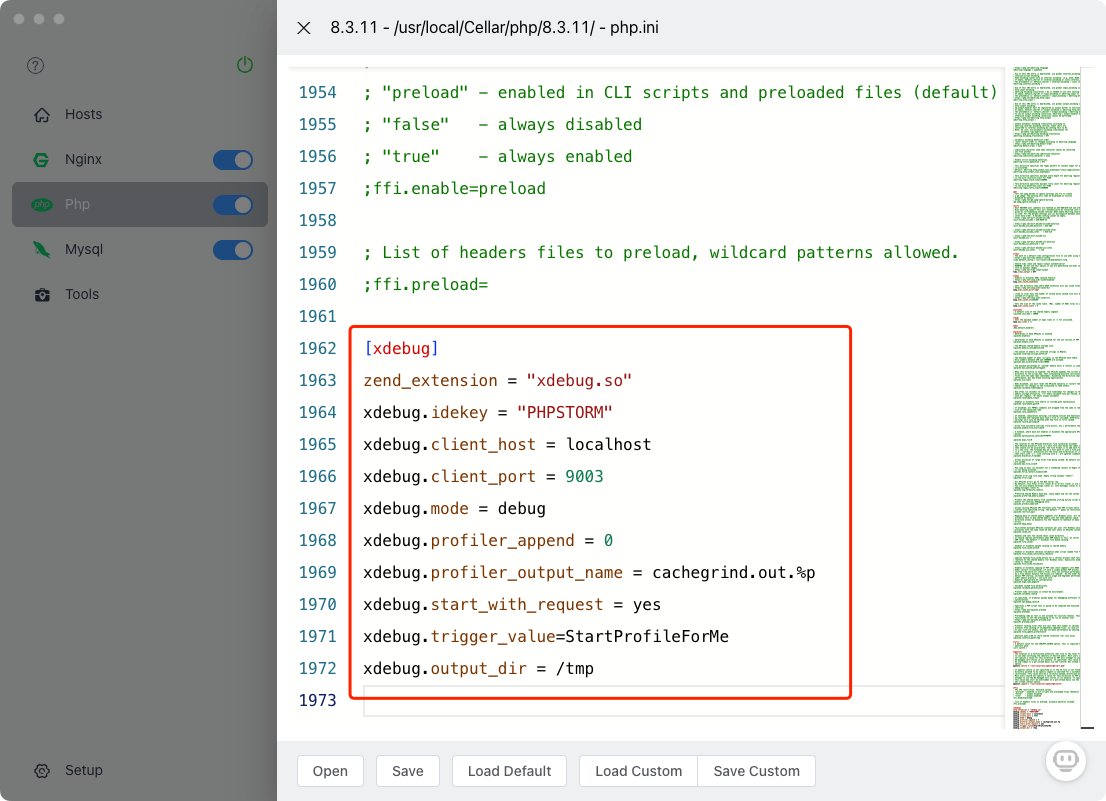
[xdebug]
zend_extension = "xdebug.so"
xdebug.idekey = "PHPSTORM"
xdebug.client_host = localhost
xdebug.client_port = 9003
xdebug.mode = debug
xdebug.profiler_append = 0
xdebug.profiler_output_name = cachegrind.out.%p
xdebug.start_with_request = yes
xdebug.trigger_value=StartProfileForMe
xdebug.output_dir = /tmp
保存然后重启 PHP 服务
在IDE中配置和使用 Xdebug
PhpStorm
设置PhpStorm使用的 PHP 版本
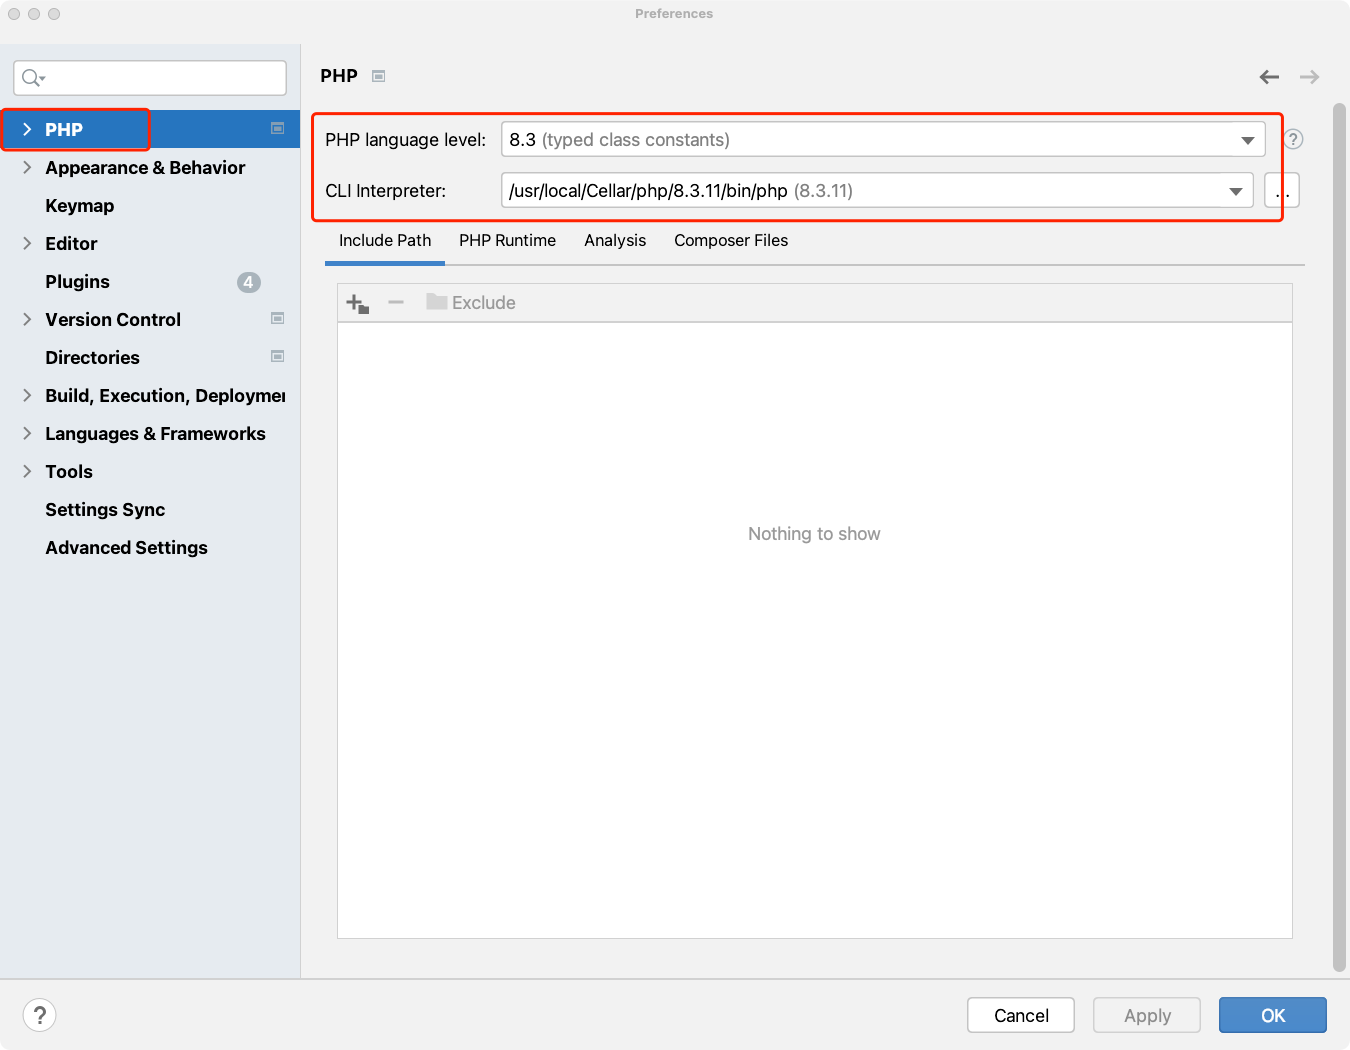
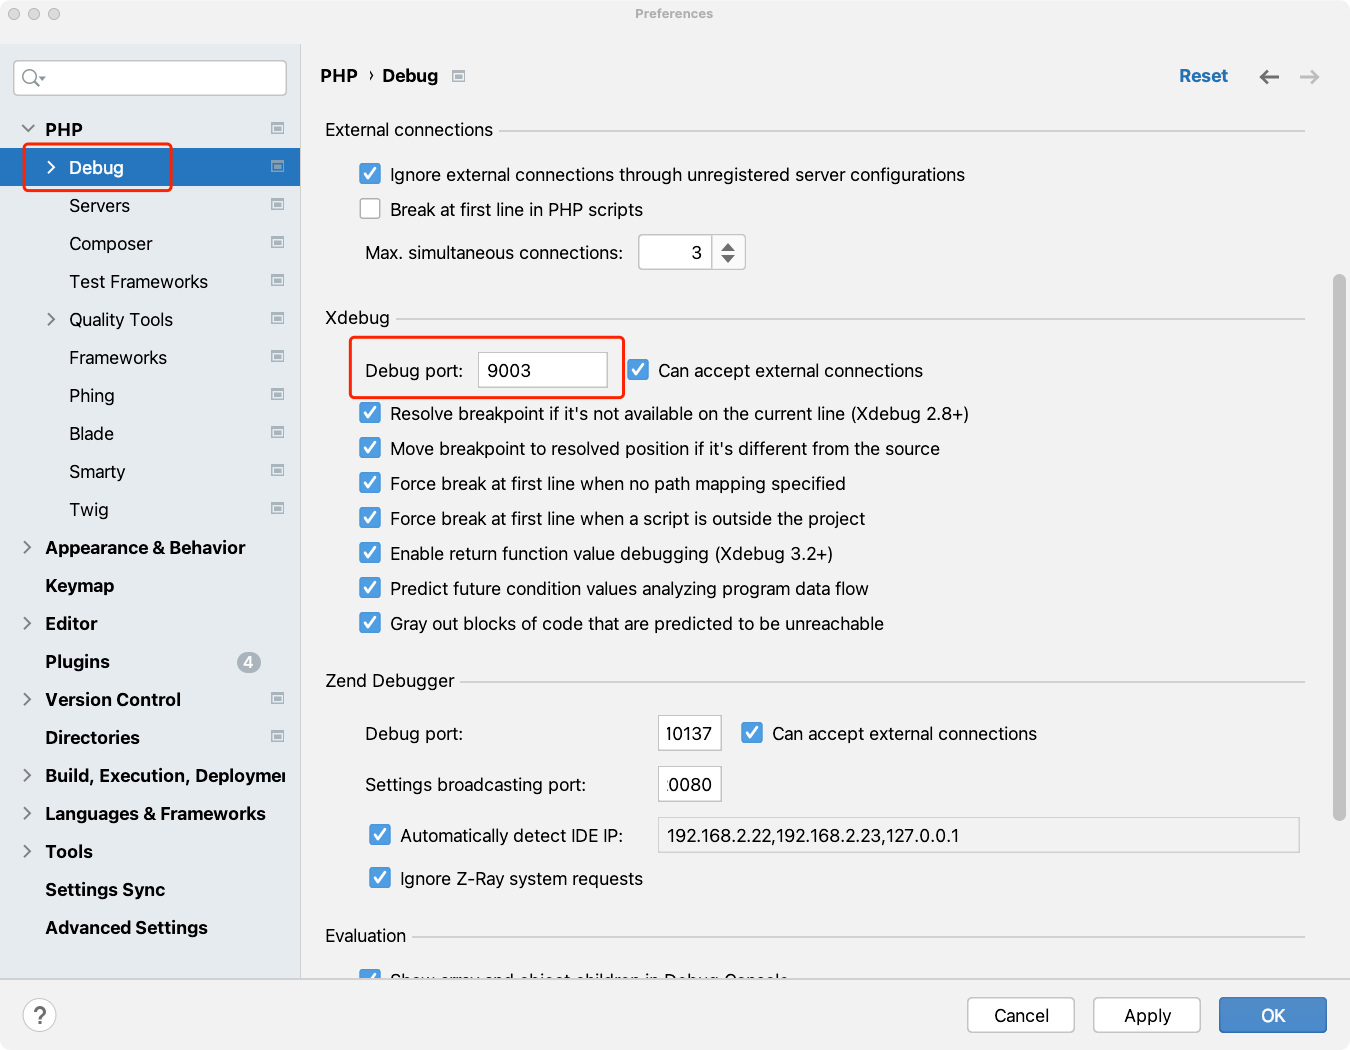
设置Xdebug使用的端口
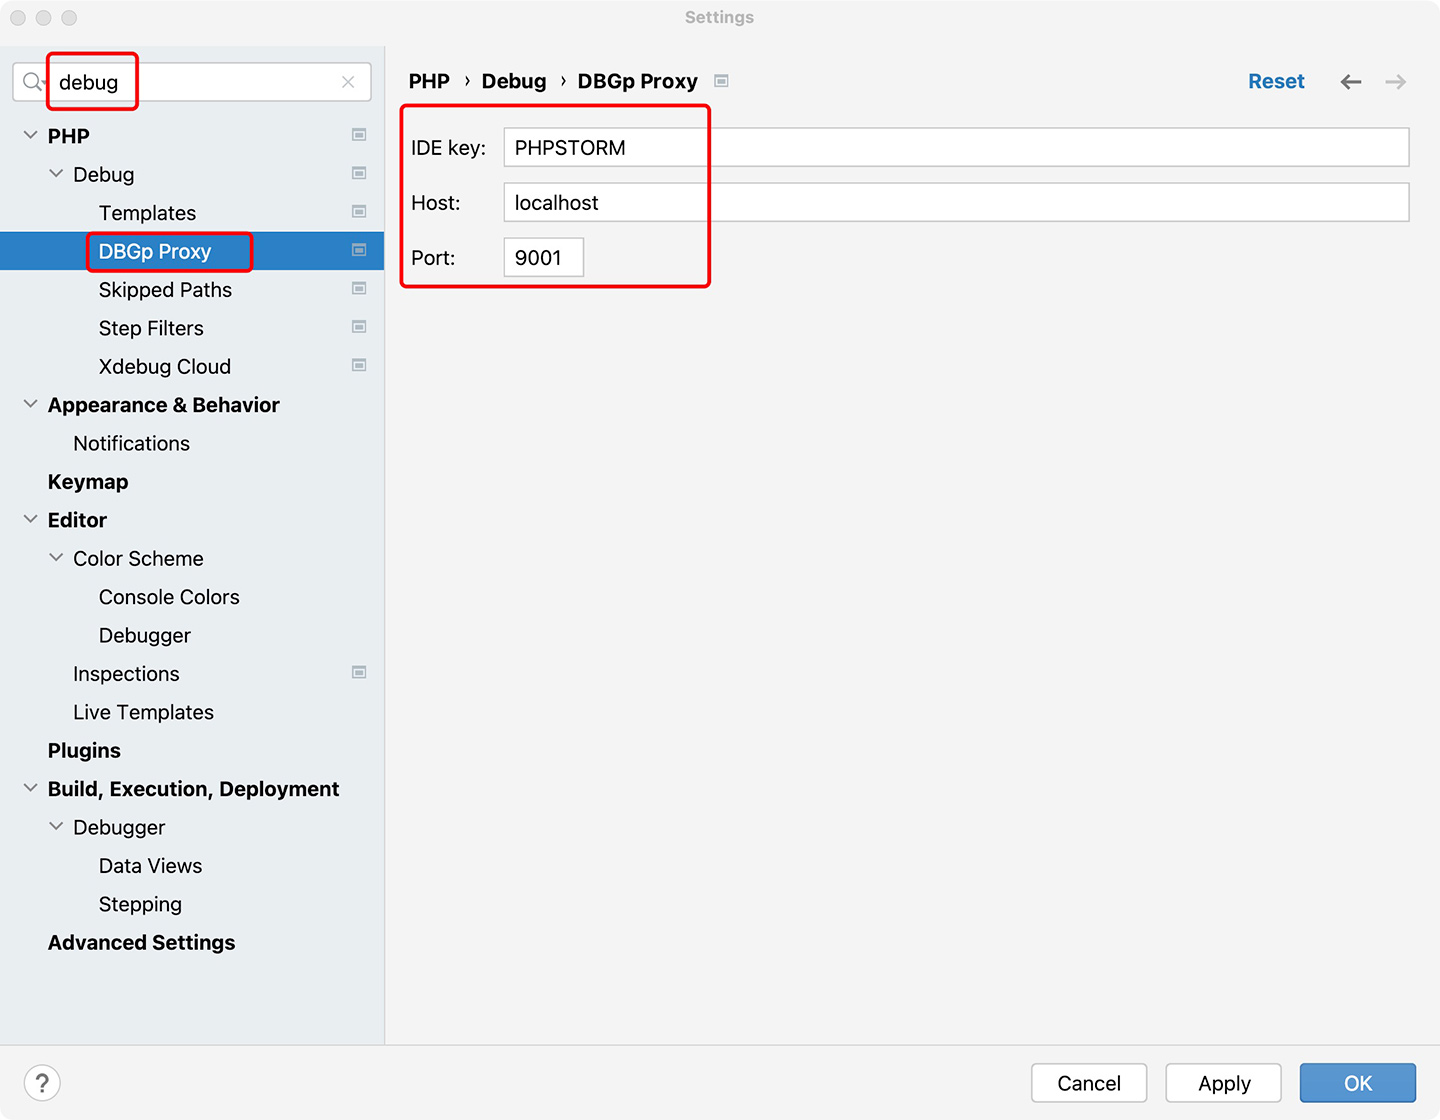
设置 IDE key 和 Host
启动XDebug监听
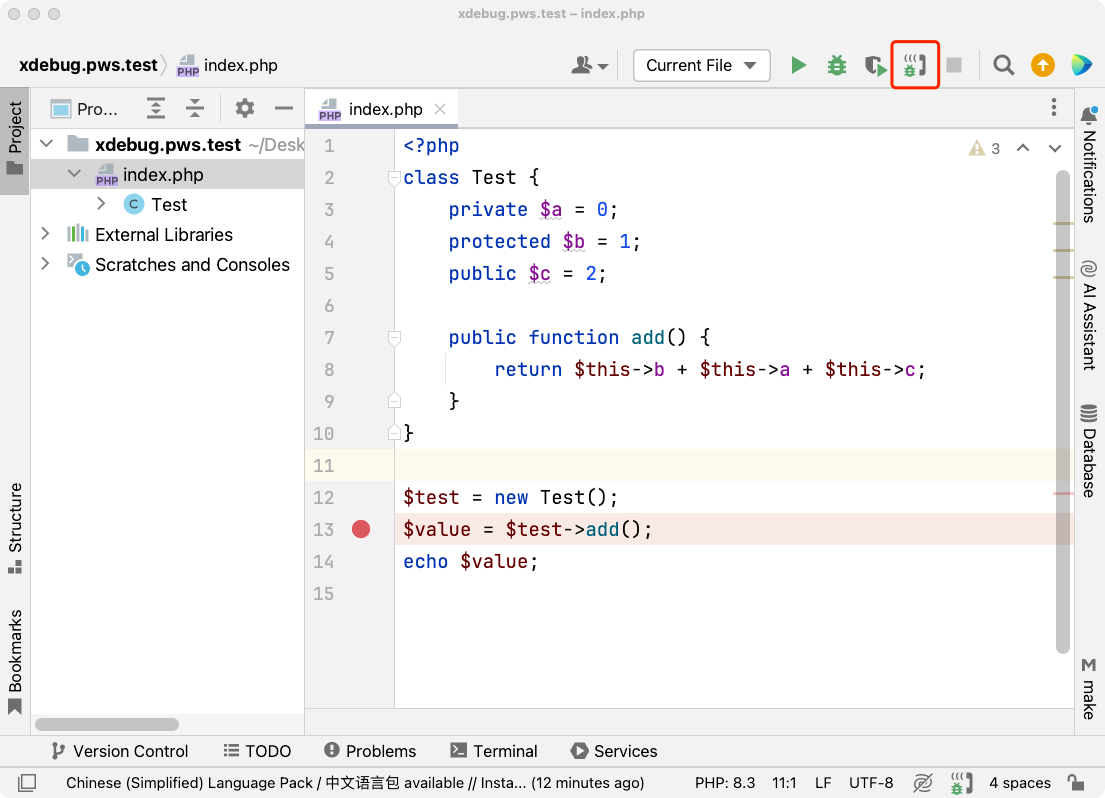
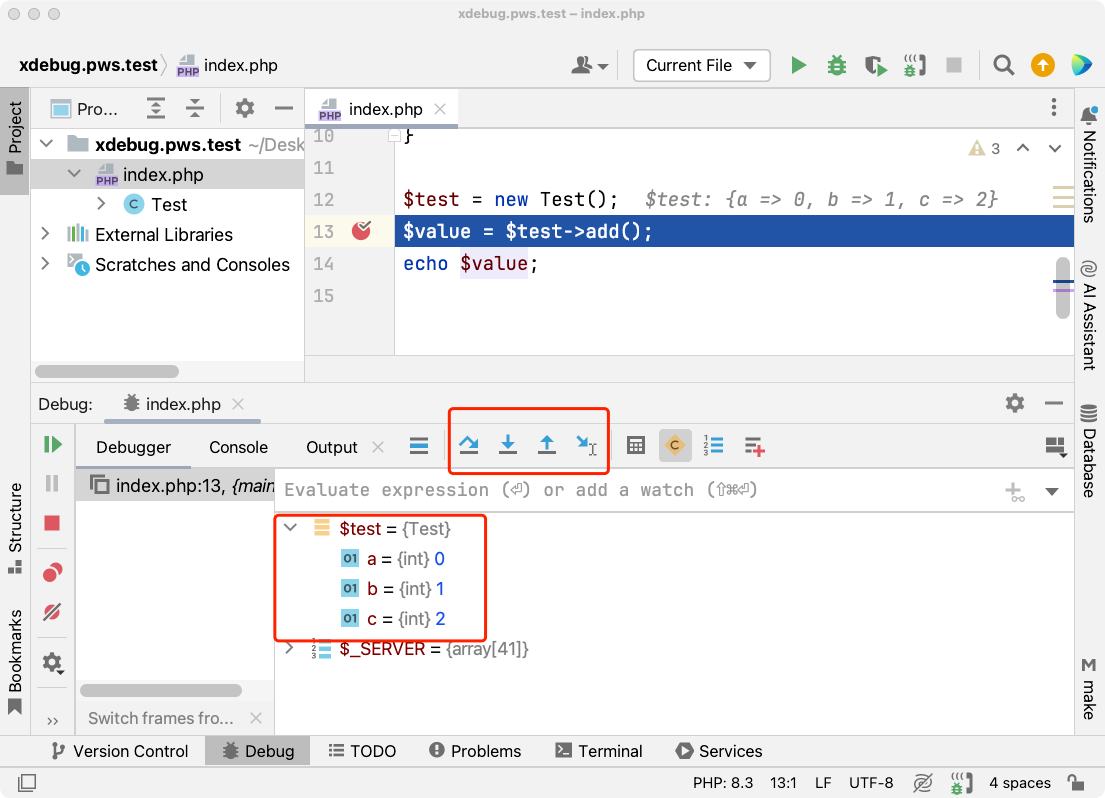
打好断点. 然后访问网站. PhpStorm会显示如下界面
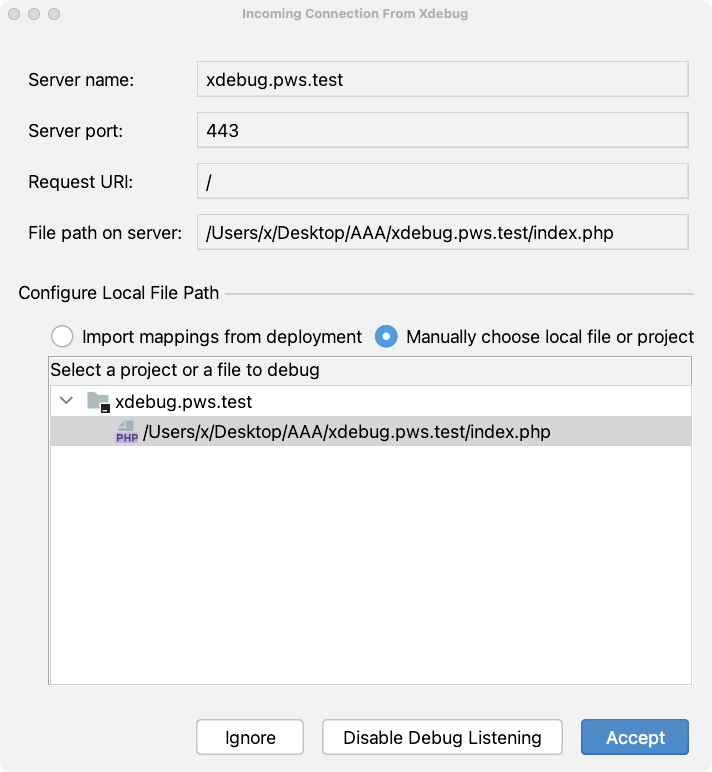
点击 'Access' 按钮. PhpStorm就会进入调试模式
VSCode
有一个流行的VSCode PHP扩展名为 php debug。您可以在扩展窗口中找到并安装。
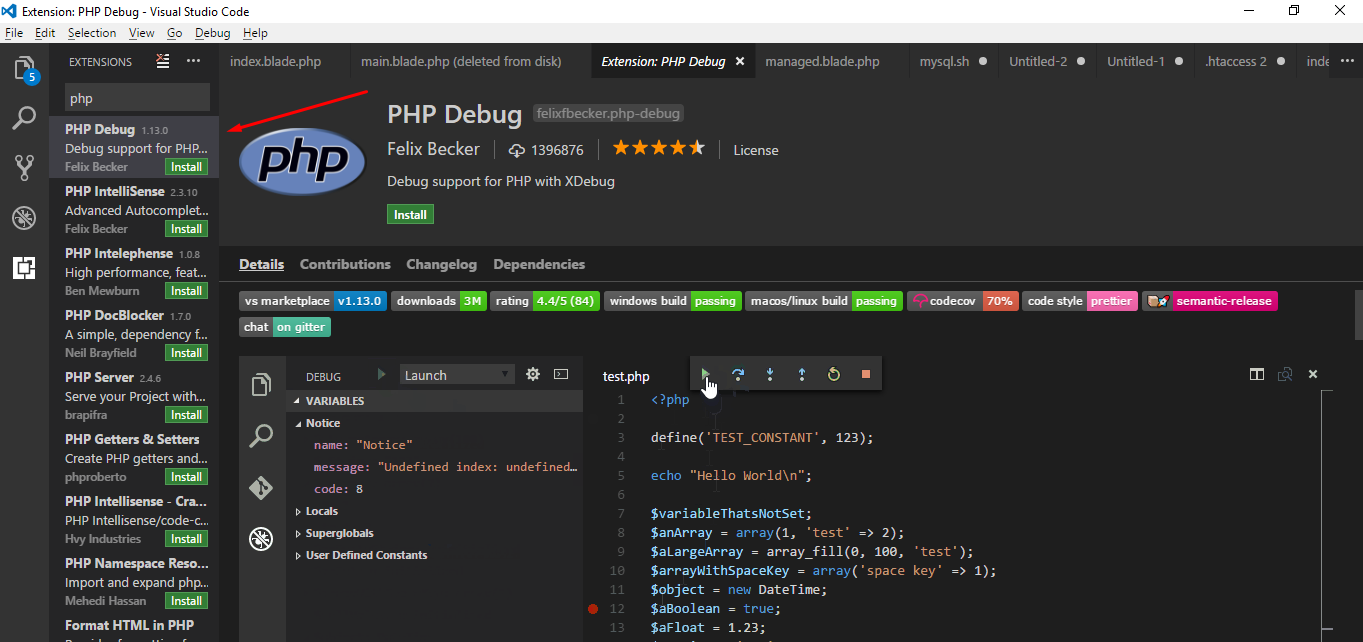
安装后,重启VSCode。再次运行phpinfo(),检查是否启用了Xdebug。
现在单击调试控制台选项卡,然后单击添加配置。
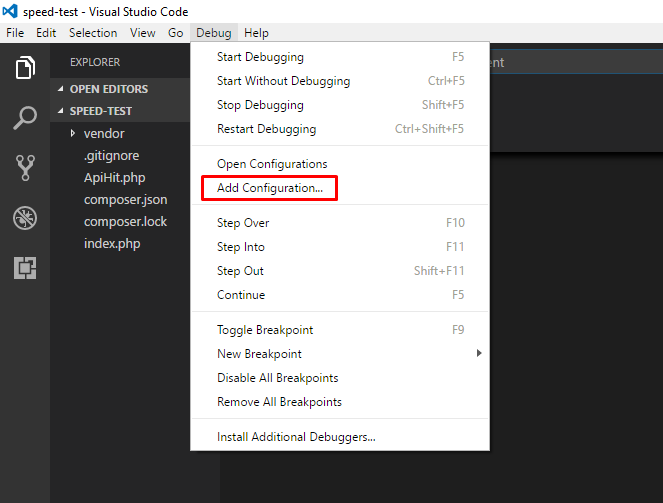
选择PHP环境。VSCode现在将在根目录中添加一个launch.json文件。
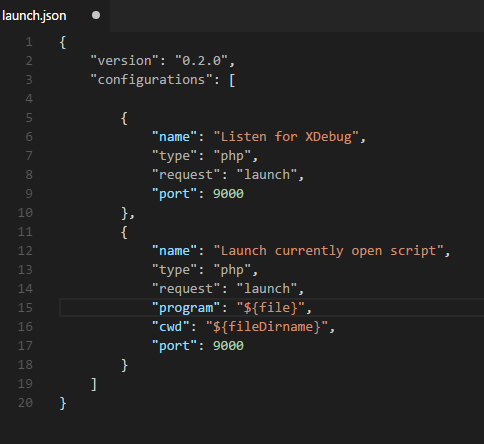
最后,将runtimeExecutable属性添加到端口后
"runtimeExecutable": "/usr/local/Cellar/php/8.3.11/bin/php"保存launch.json文件。打开调试模式选项卡,单击绿色的调试按钮启动调试选项。
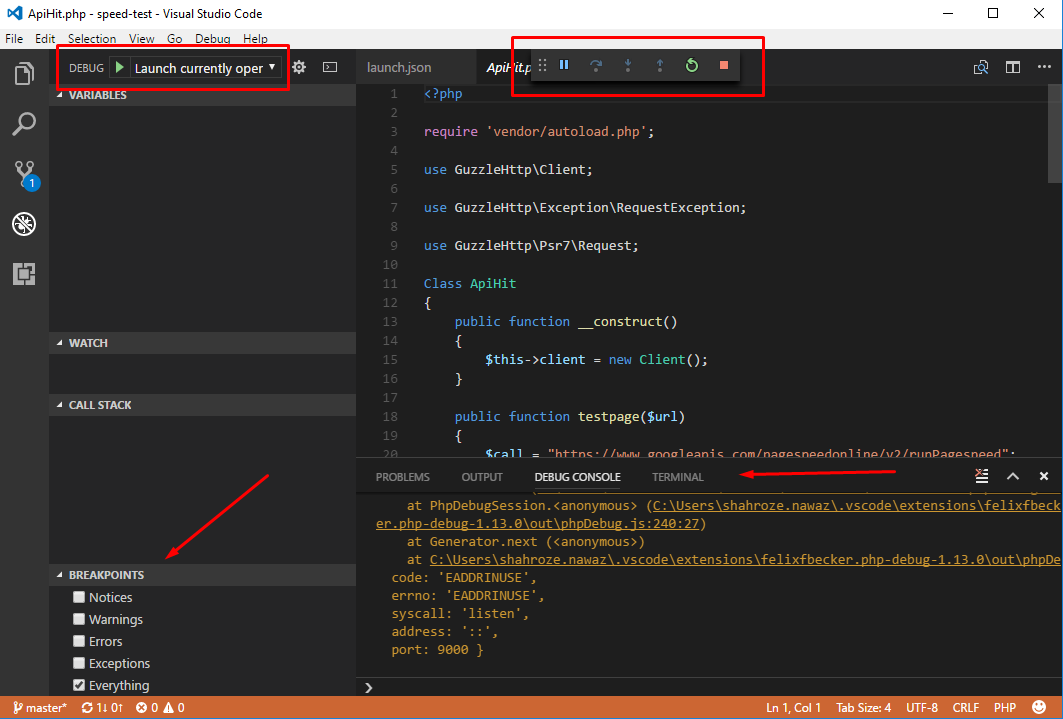
现在,您将在窗口中看到一些项目,您可以通过这些项目选择Xdebugger将显示的日志
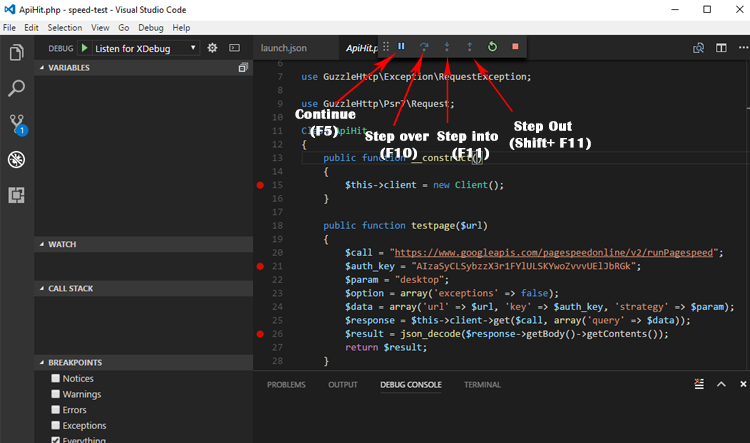
导航到调试控制台,该部分显示错误的详细信息和顶部的调试执行按钮。
此时,您可以在需要调试的代码行上添加断点。请注意,Xdebug将在左下角添加PHP调试脚本名称和行号:
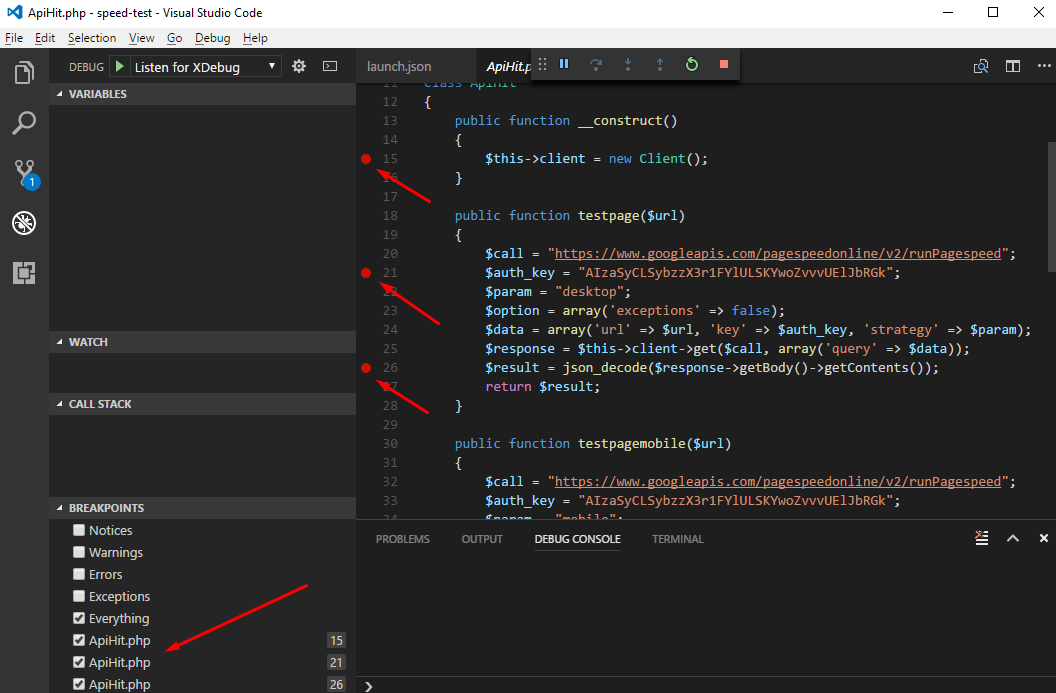
您可以在浏览器中运行应用程序,然后逐行读取代码,查看错误并调试。此外,您需要记住一些快捷功能键,以便在功能和代码行之间移动:
F5: Continue Debugging
F10: Step Over
F11: Step into
Shift + F11: Step out
